Download and Install the Plugin
You can download the FedaPay plugin for PrestaShop by clicking here. Installation Steps :
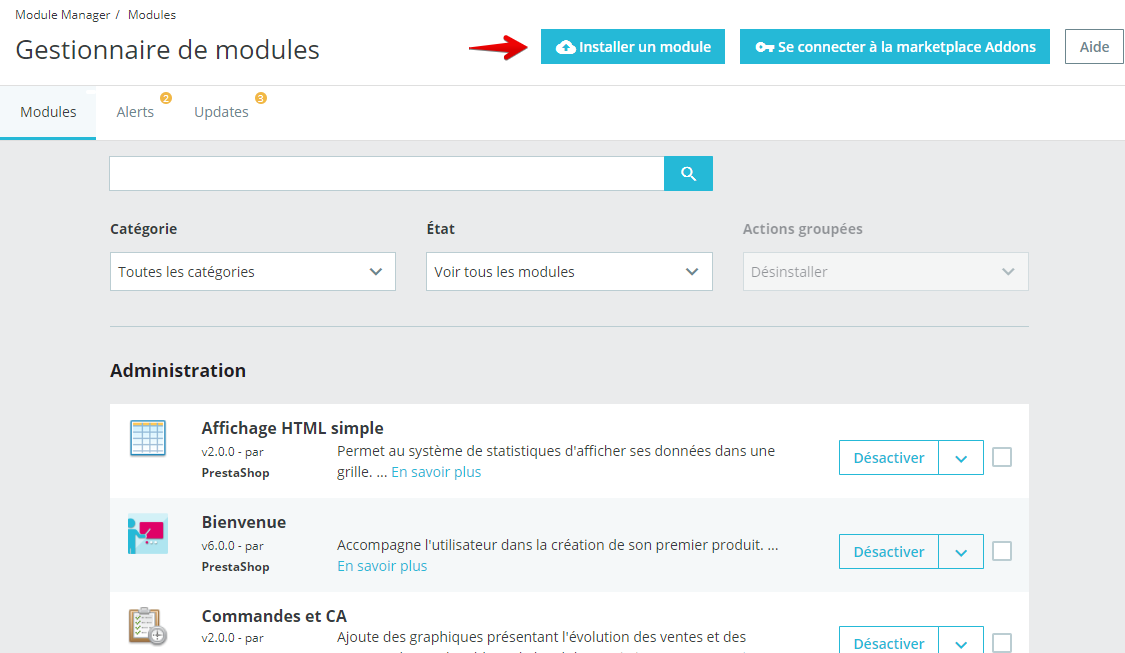
- Go to your PrestaShop dashboard.
-
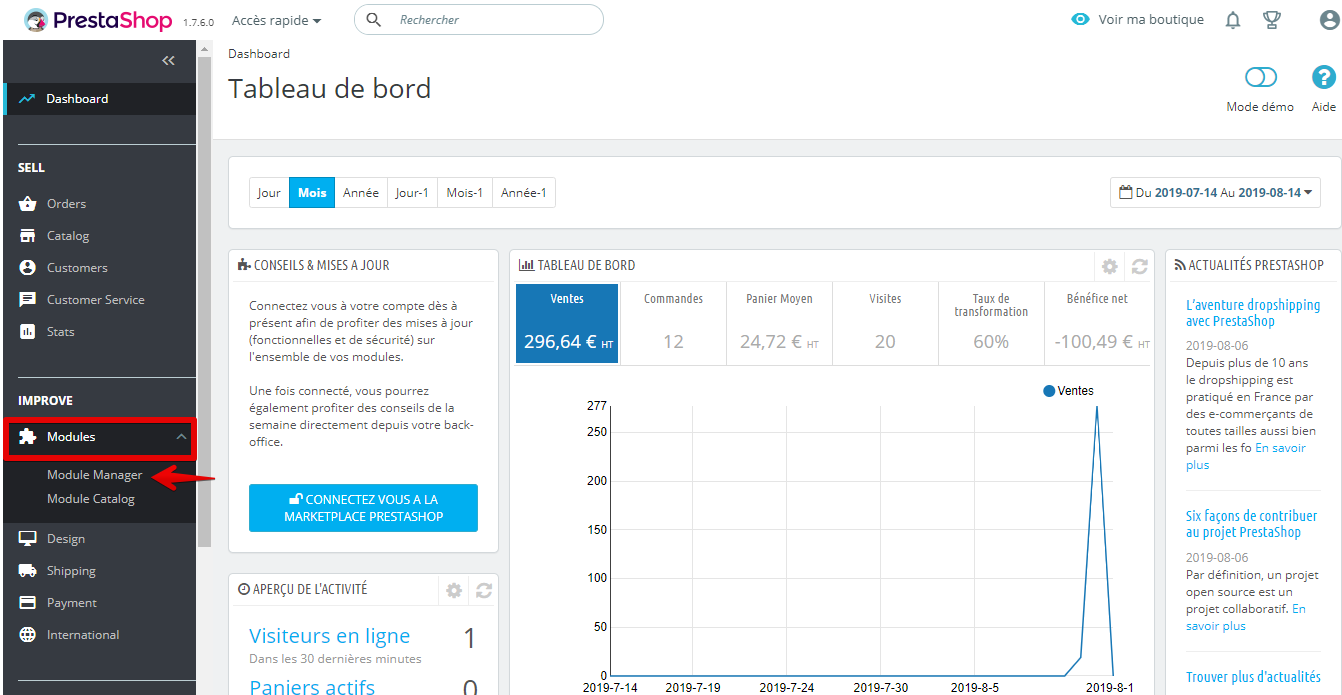
Click on Modules > Module Manager.
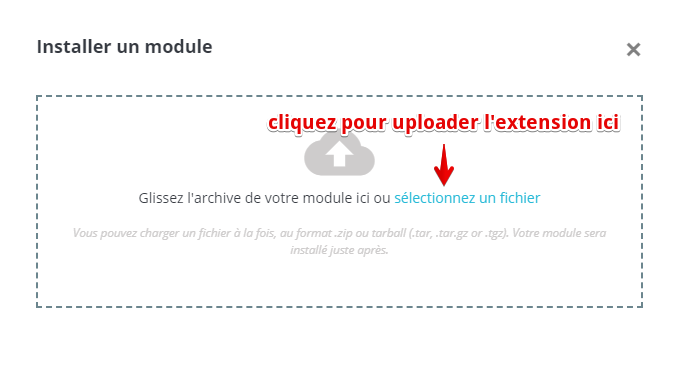
- Click on Install a module.
-
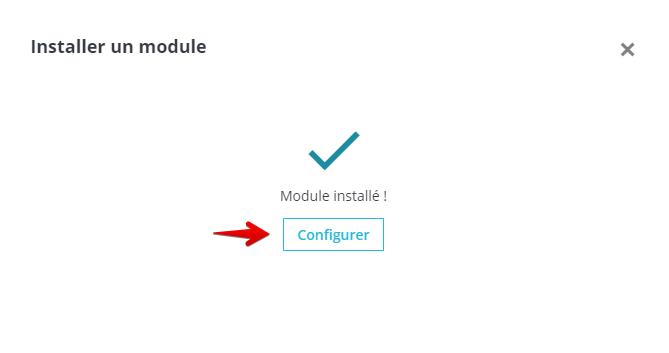
Upload the plugin file you downloaded.
Configure the FedaPay Plugin
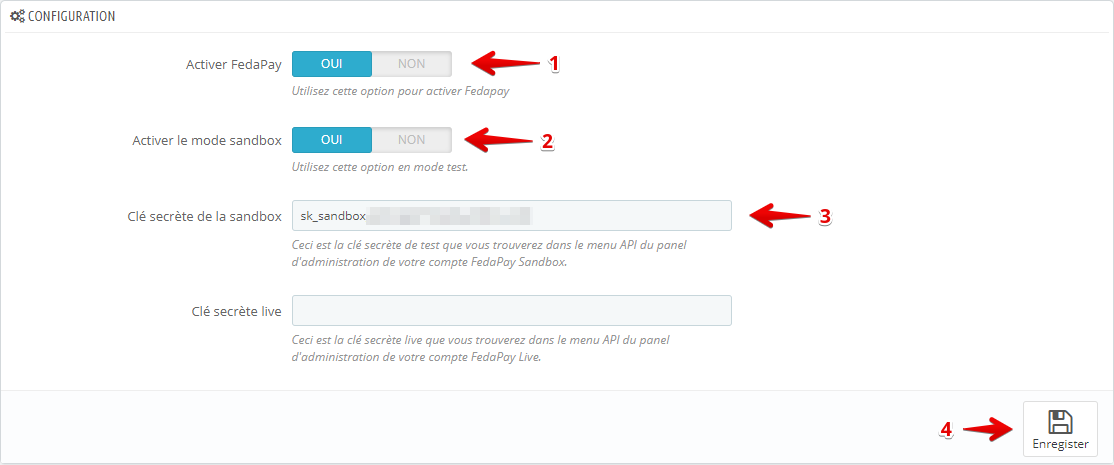
After installation, click on Configure to access FedaPay’s settings.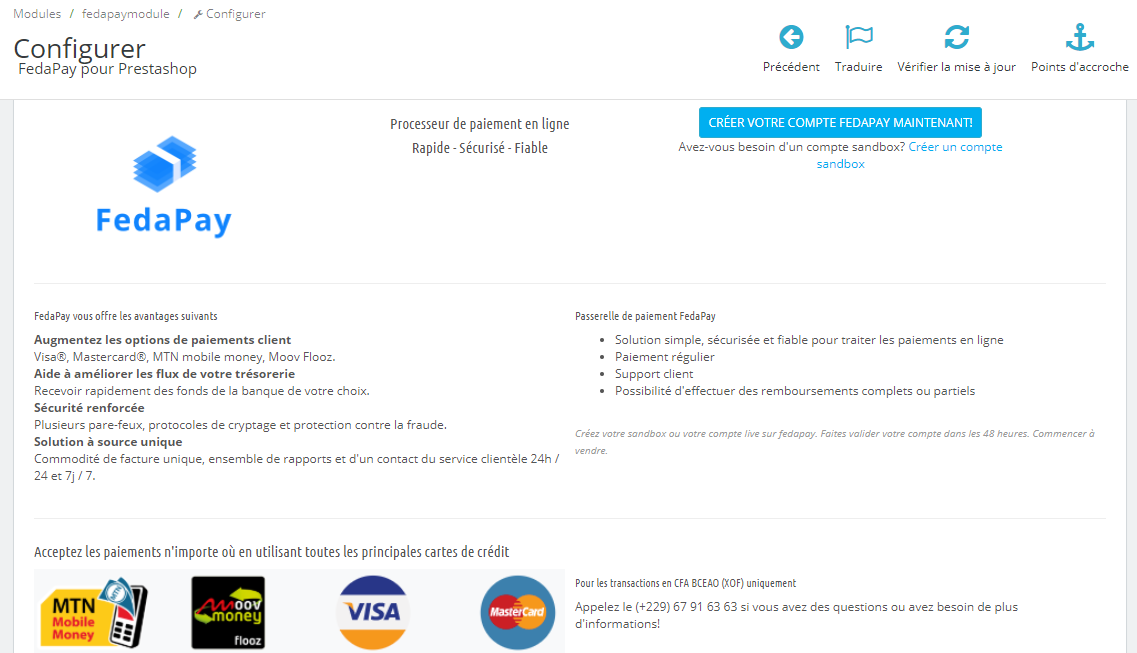 You can configure the plugin to work in either Test Mode (Sandbox) or Live Mode depending on your needs:Test Mode (Sandbox) :
You can configure the plugin to work in either Test Mode (Sandbox) or Live Mode depending on your needs:Test Mode (Sandbox) :- Log in to your FedaPay Sandbox account.
- Go to the API menu and copy the test secret key (sk_sandbox).
-
Paste this key into the corresponding field in PrestaShop.
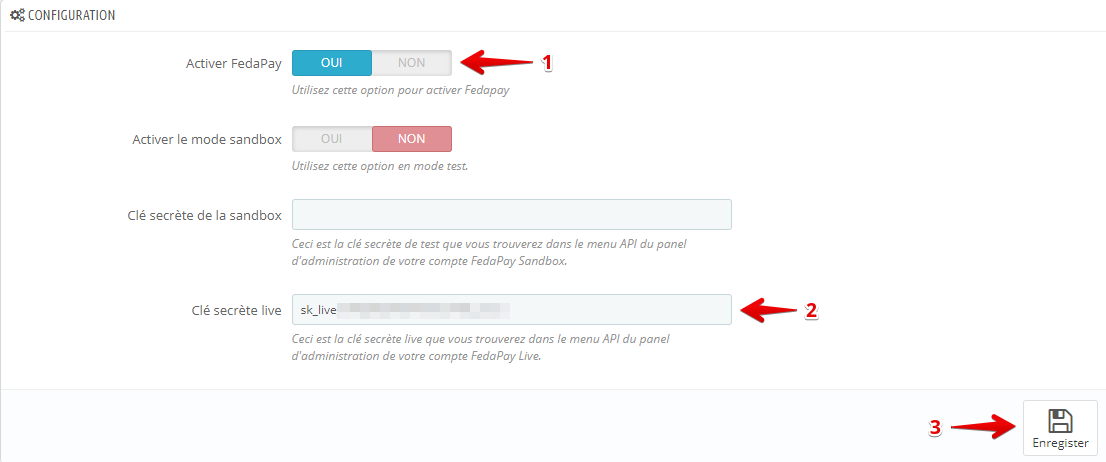
- Log in to your FedaPay Live account.
- Go to the API menu and copy the live secret key (sk_live).
-
Paste this key into the corresponding field in PrestaShop.
Configure the Currency (FCFA)
FedaPay currently only supports FCFA, so you need to configure this currency as the default in PrestaShop.Steps to add FCFA :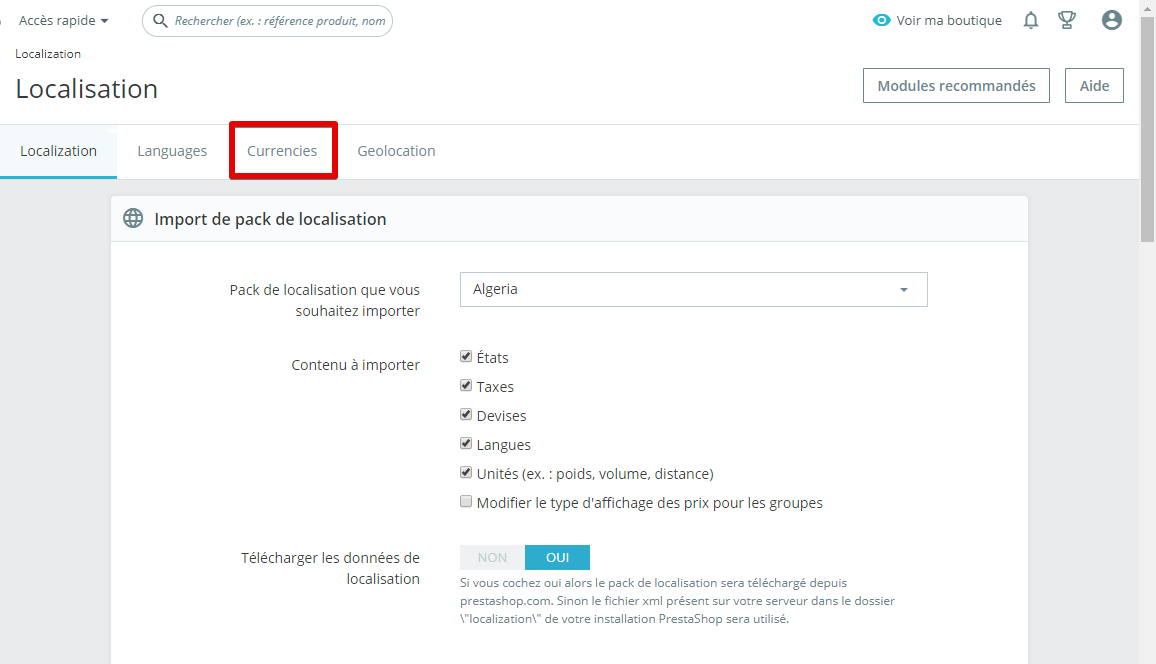
 Once FCFA is added, it will appear in your store’s currency list.
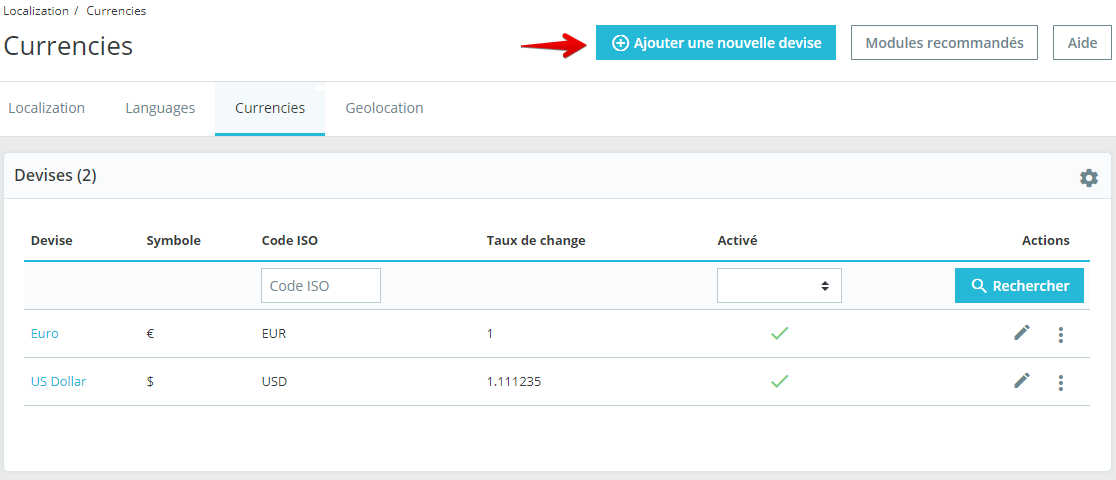 Set FCFA as the default currency :
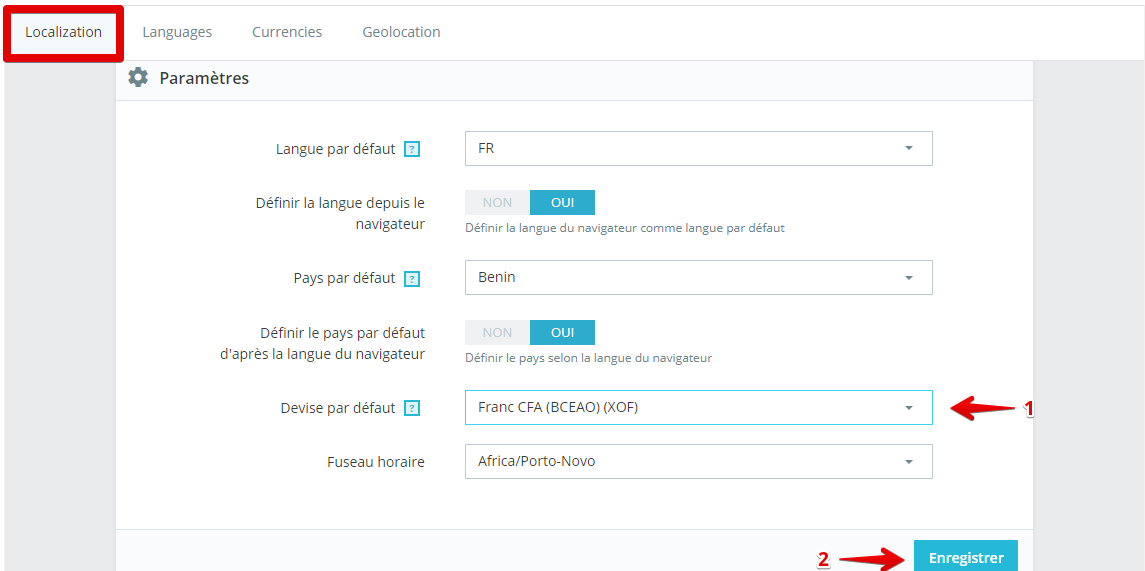
-
Go to International > Localization.
- Click on the Currencies tab.
-
Click on Add a currency.
- Select FCFA from the dropdown list.
- Set the conversion rate to Euro (if needed).
Once FCFA is added, it will appear in your store’s currency list.Set FCFA as the default currency :- Return to Localization.
- Scroll down to the currency settings.
- Choose FCFA as the default currency.