Install the Plugin
Before starting, follow these simple steps to install the plugin:
- Create a FedaPay account by signing up here.
- Download the FedaPay WHMCS plugin available on GitHub here.
- Once downloaded, you will need to copy the files into the appropriate folders in your WHMCS system.
- Copy the fedapay-php/ folder and fedapay.php file into the modules/gateways/ folder of your WHMCS installation.
- Copy the contents of the callback/ folder into modules/gateways/callback/.
Configure the Plugin in WHMCS
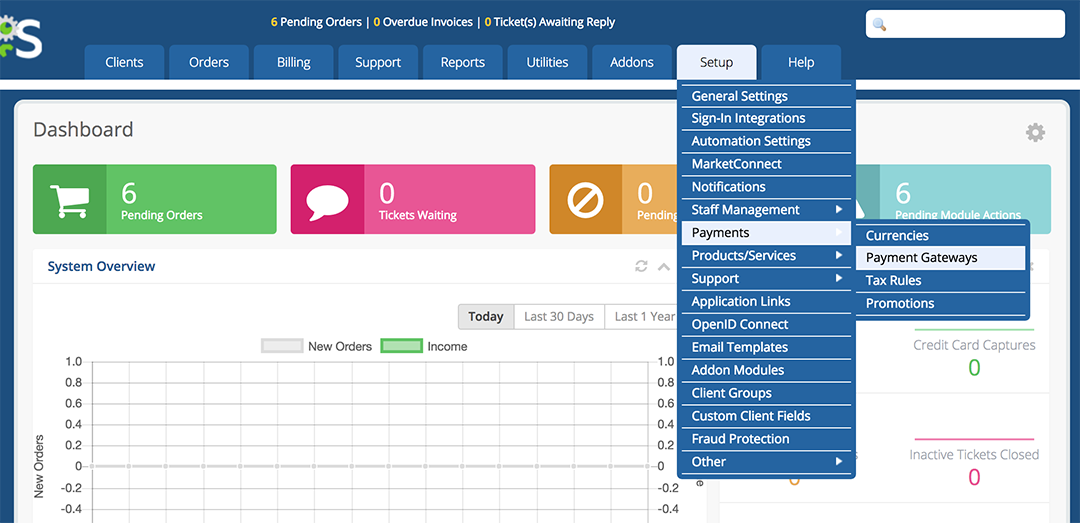
Once the plugin files are installed, follow these steps to configure FedaPay in WHMCS :Step 1: Access Payment Settings
-
In your WHMCS dashboard, go to Setup > Payments > Payment Gateways.
-
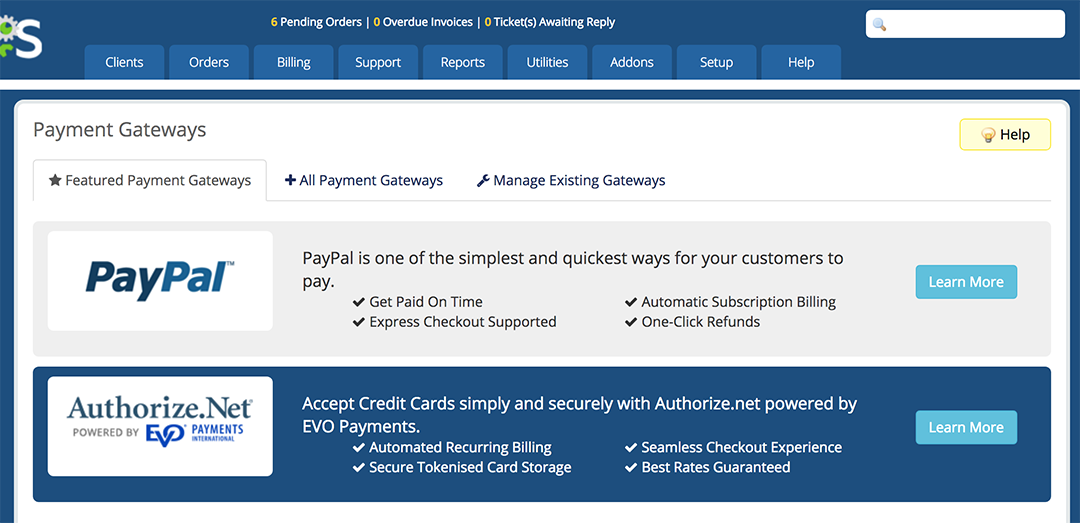
Click on the All Payment Gateways tab to view the full list of available payment gateways.

- In the list, select FedaPay to activate it.
- Check the box Show on Order Form to allow your customers to see FedaPay on the order form.
- If you are in test mode, check the Sandbox Mode box. Otherwise, leave it unchecked for live transactions.
- Log in to your FedaPay Sandbox (test) and FedaPay Live (real) accounts.
-
Copy the secret API keys for each mode:
- sk_sandbox for the test mode.
- sk_live for the real mode.
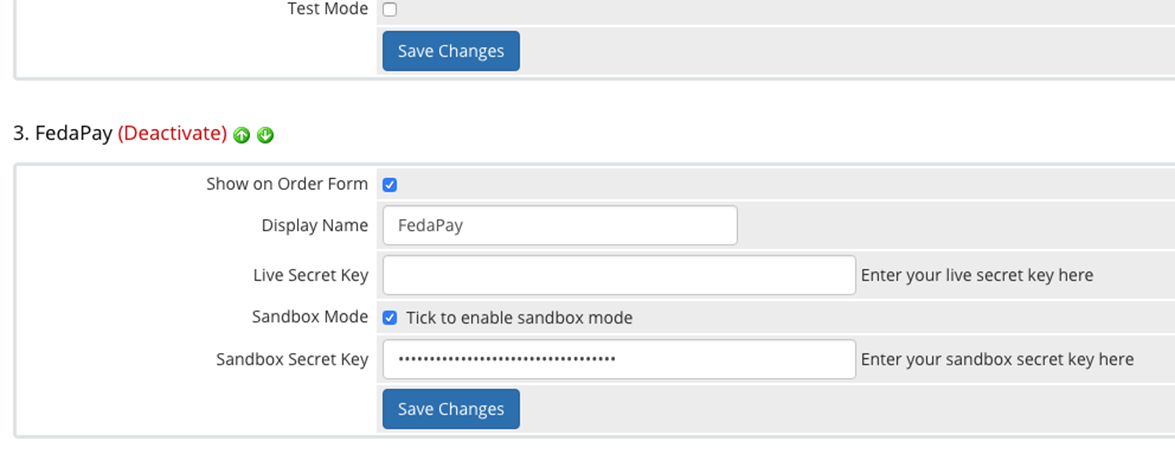
- Paste these keys into the corresponding fields in WHMCS.
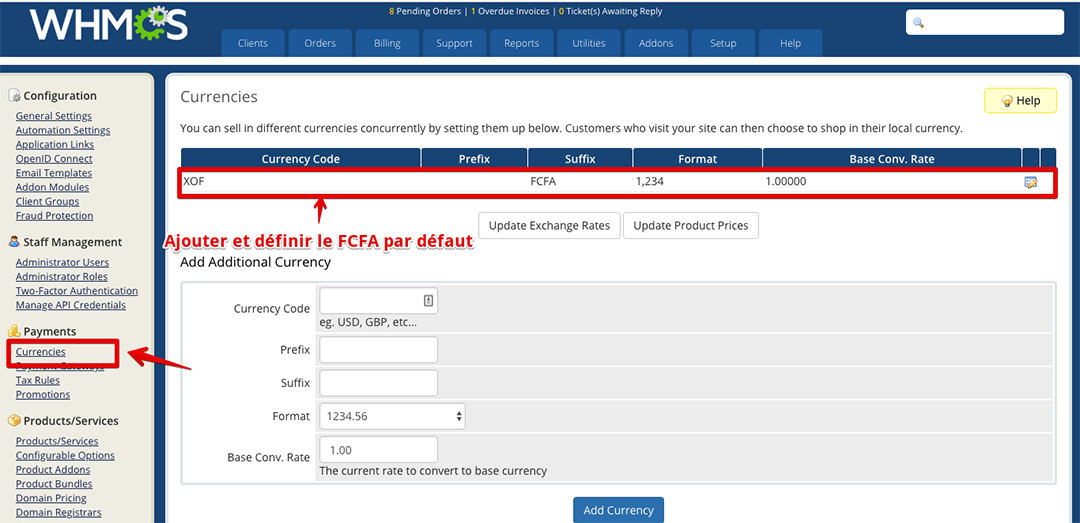
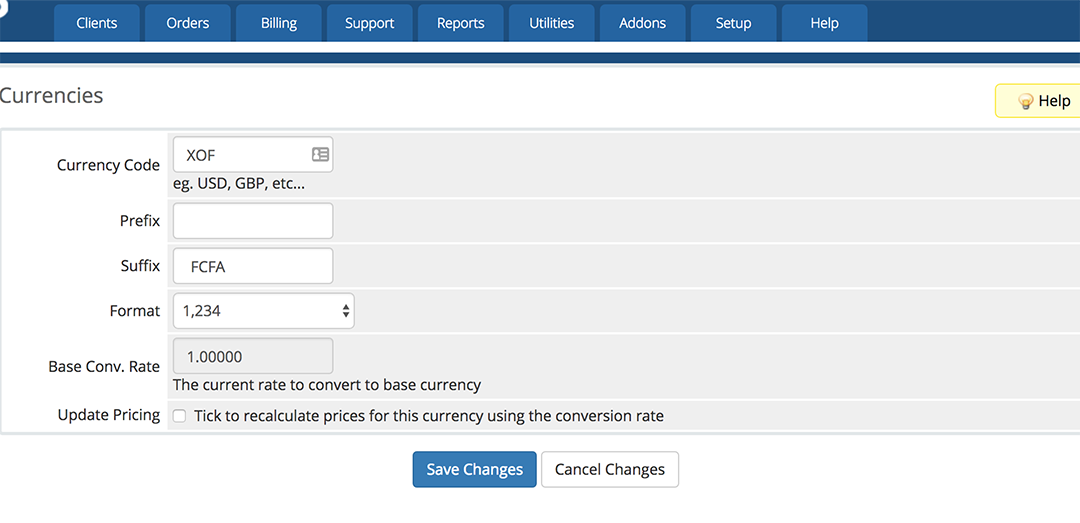
Add XOF (FCFA) Currency
To allow your customers to pay in FCFA (XOF), you need to add this currency in WHMCS.
- In the Payments menu, click on Currencies.
-
Modify the default currency or add XOF as a new currency.