Here are the steps to integrate the FedaPay plugin into your project:
Step 1 : Install the FedaPay plugin
1- Open your Bubble app editor. 2- Go to the Plugins tab (left menu). 3- Click on Add plugins, then search for FedaPay Payment Gateway. 4- Click Install to add it to your app.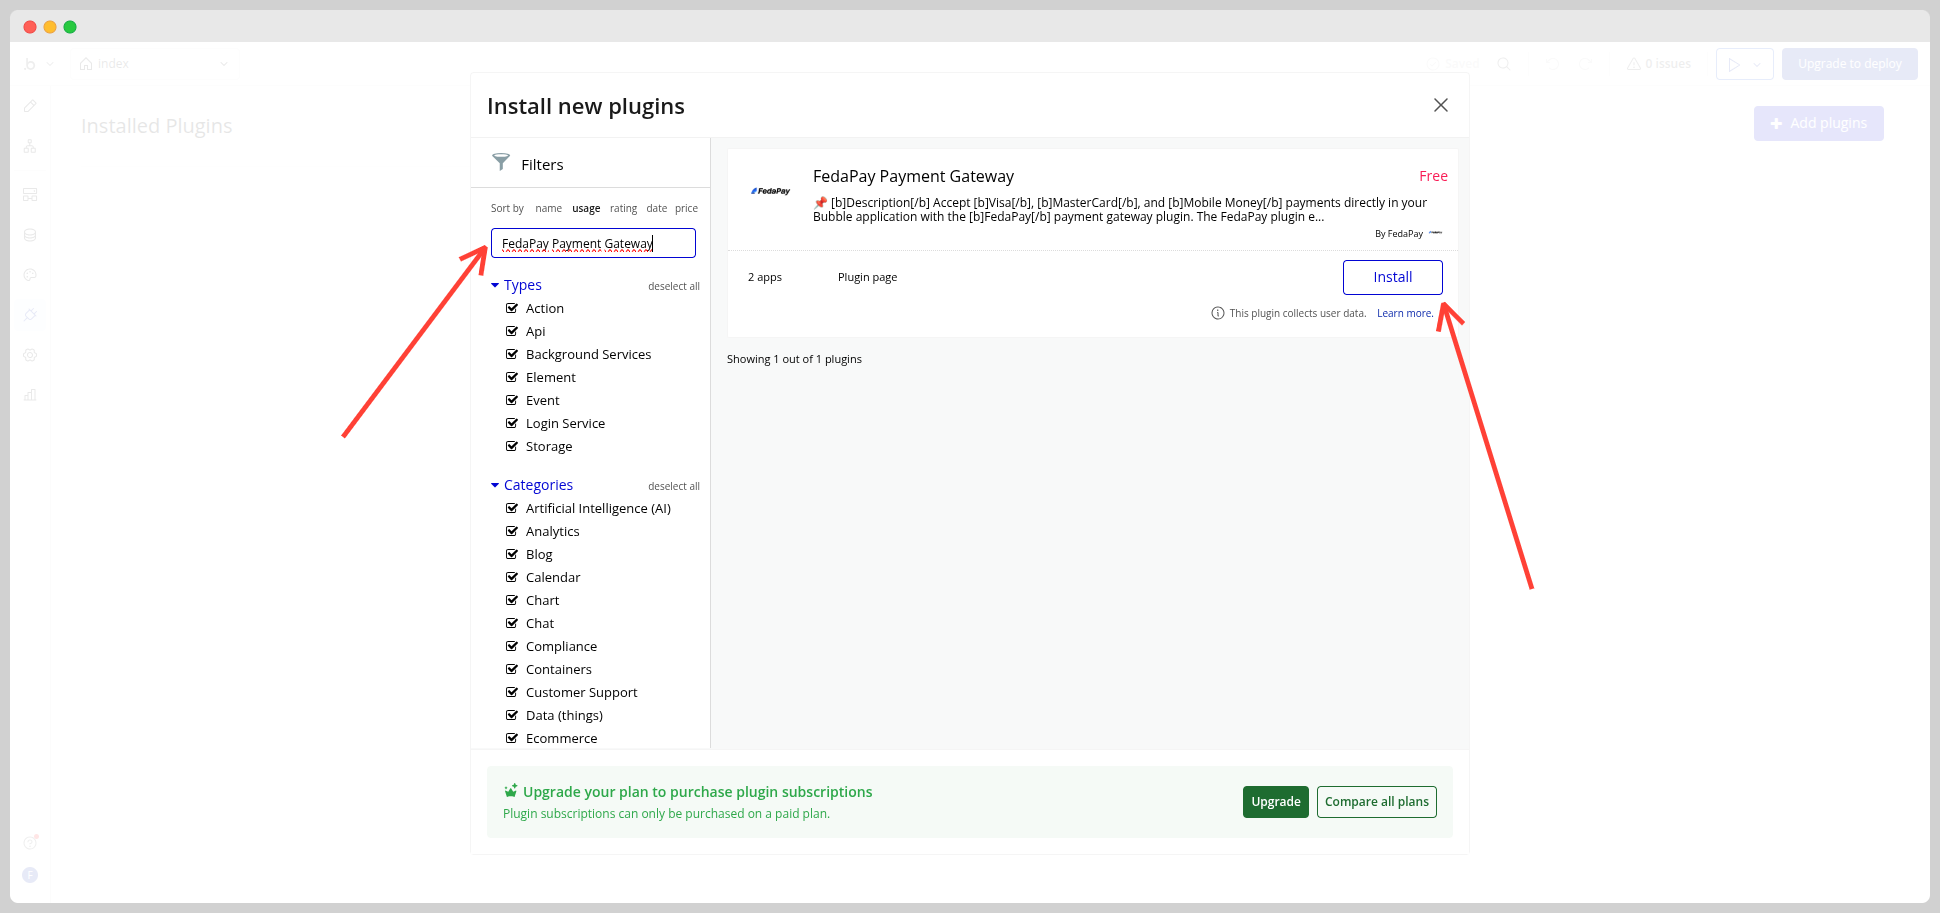
Tip: Once installed, you will see the plugin in the Installed plugins list.
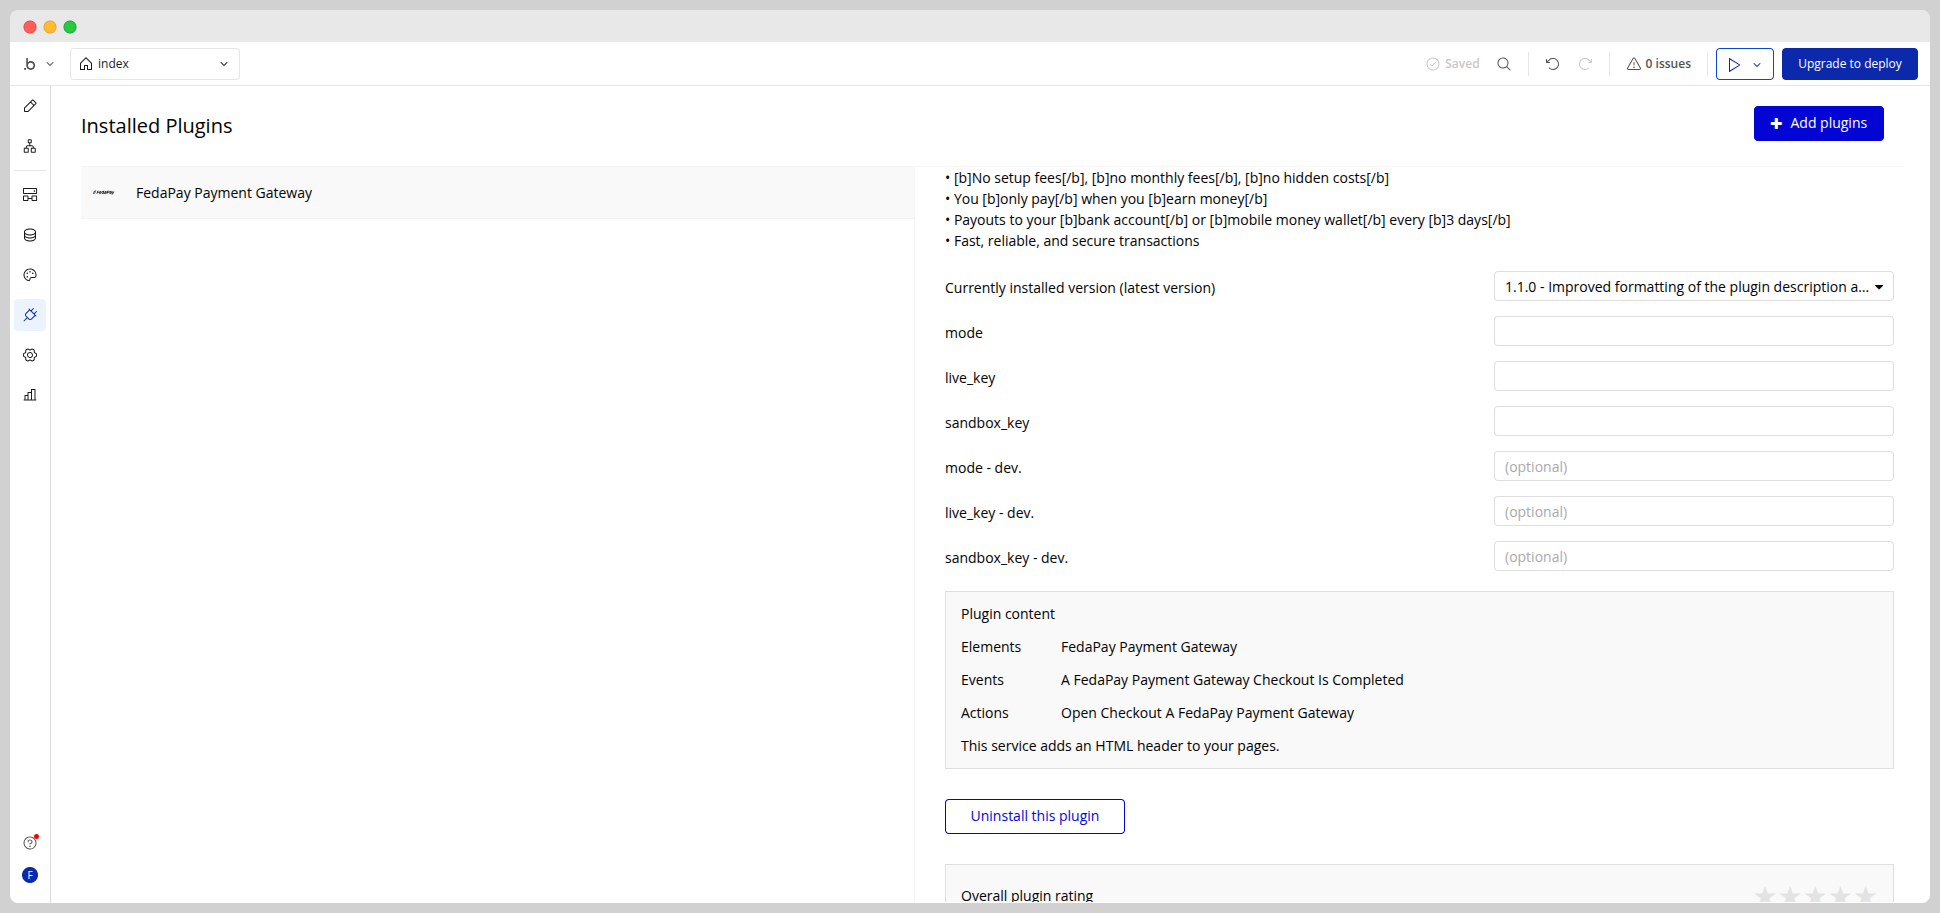
Step 2 : Configure the FedaPay API keys
1- In the Plugins tab, click on FedaPay Payment Gateway. 2- Enter your API keys:- Sandbox key if you are in test mode
- Live key if you are ready to accept real payments
Step 3 : Add the FedaPay element to your page
1- In Bubble’s Design tab, search for FedaPay Payment Gateway in the visual elements list. 2- Drag and drop this element anywhere on your page.Why is this element necessary?
Even if it can be invisible to your users, this element allows Bubble to trigger the payment window. Do not delete it.
Even if it can be invisible to your users, this element allows Bubble to trigger the payment window. Do not delete it.
Step 4 : Create a button to trigger the payment
1- Add a button (e.g., “Pay now”) in the editor. 2- Click on it, then select Add/Edit Workflow.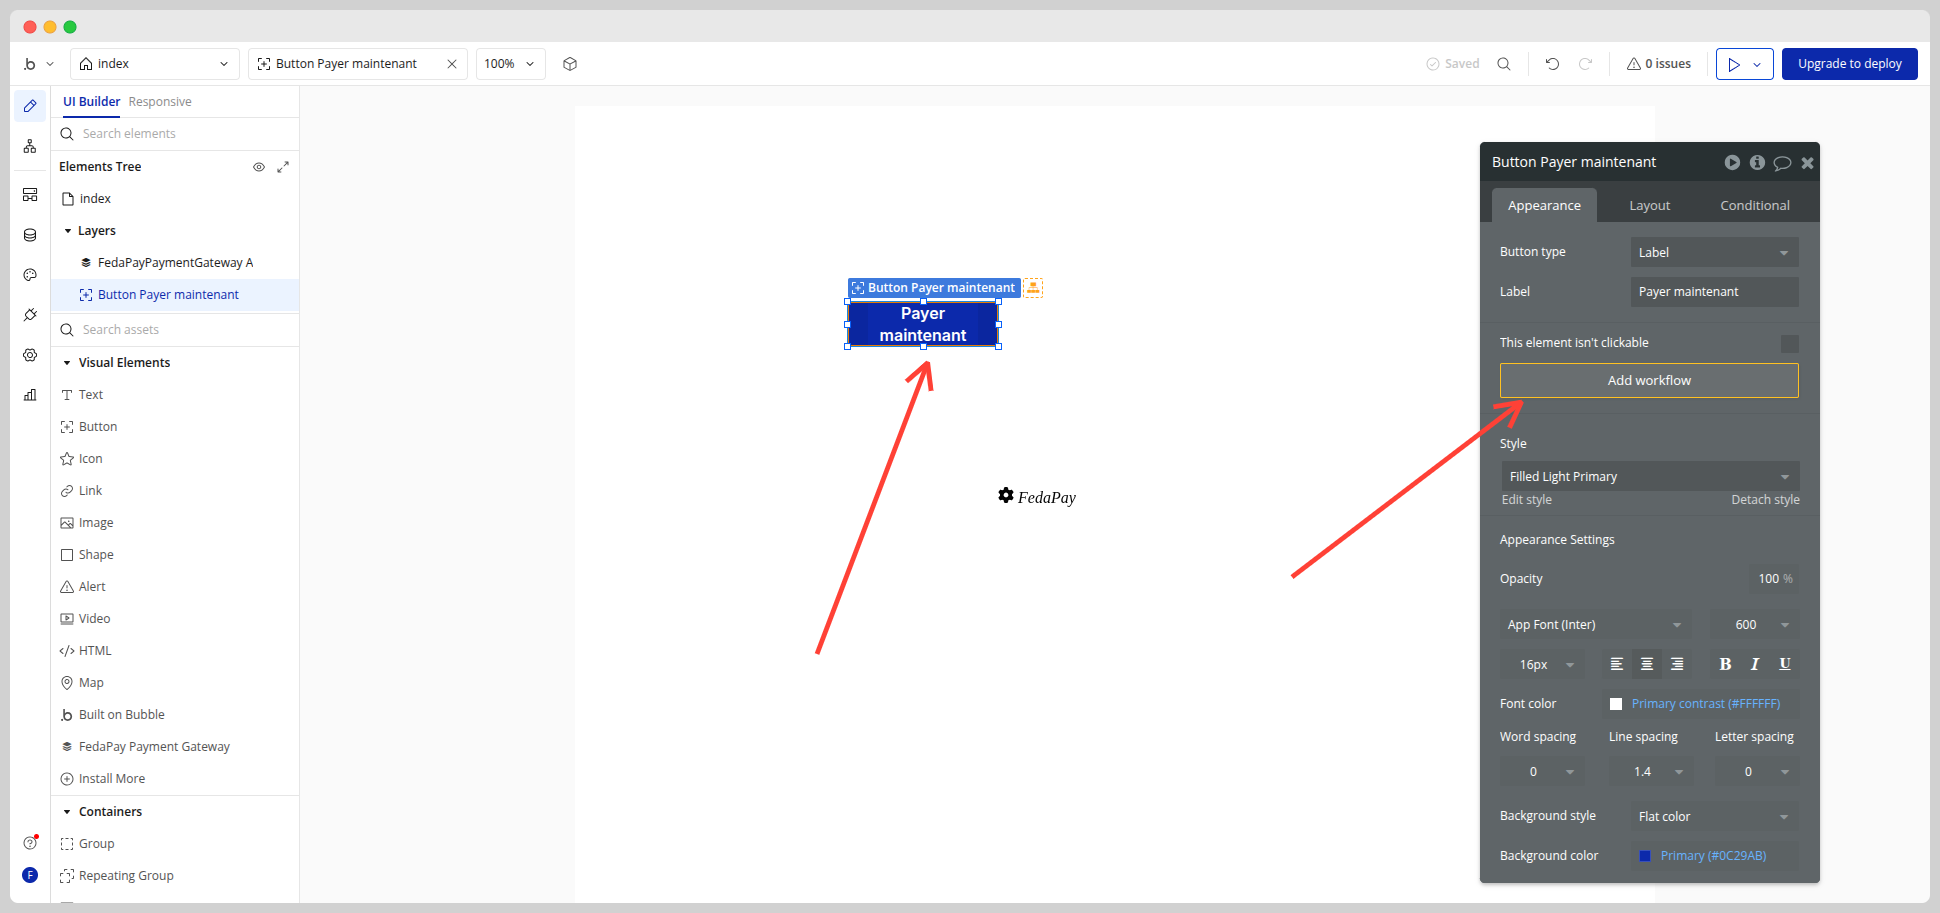
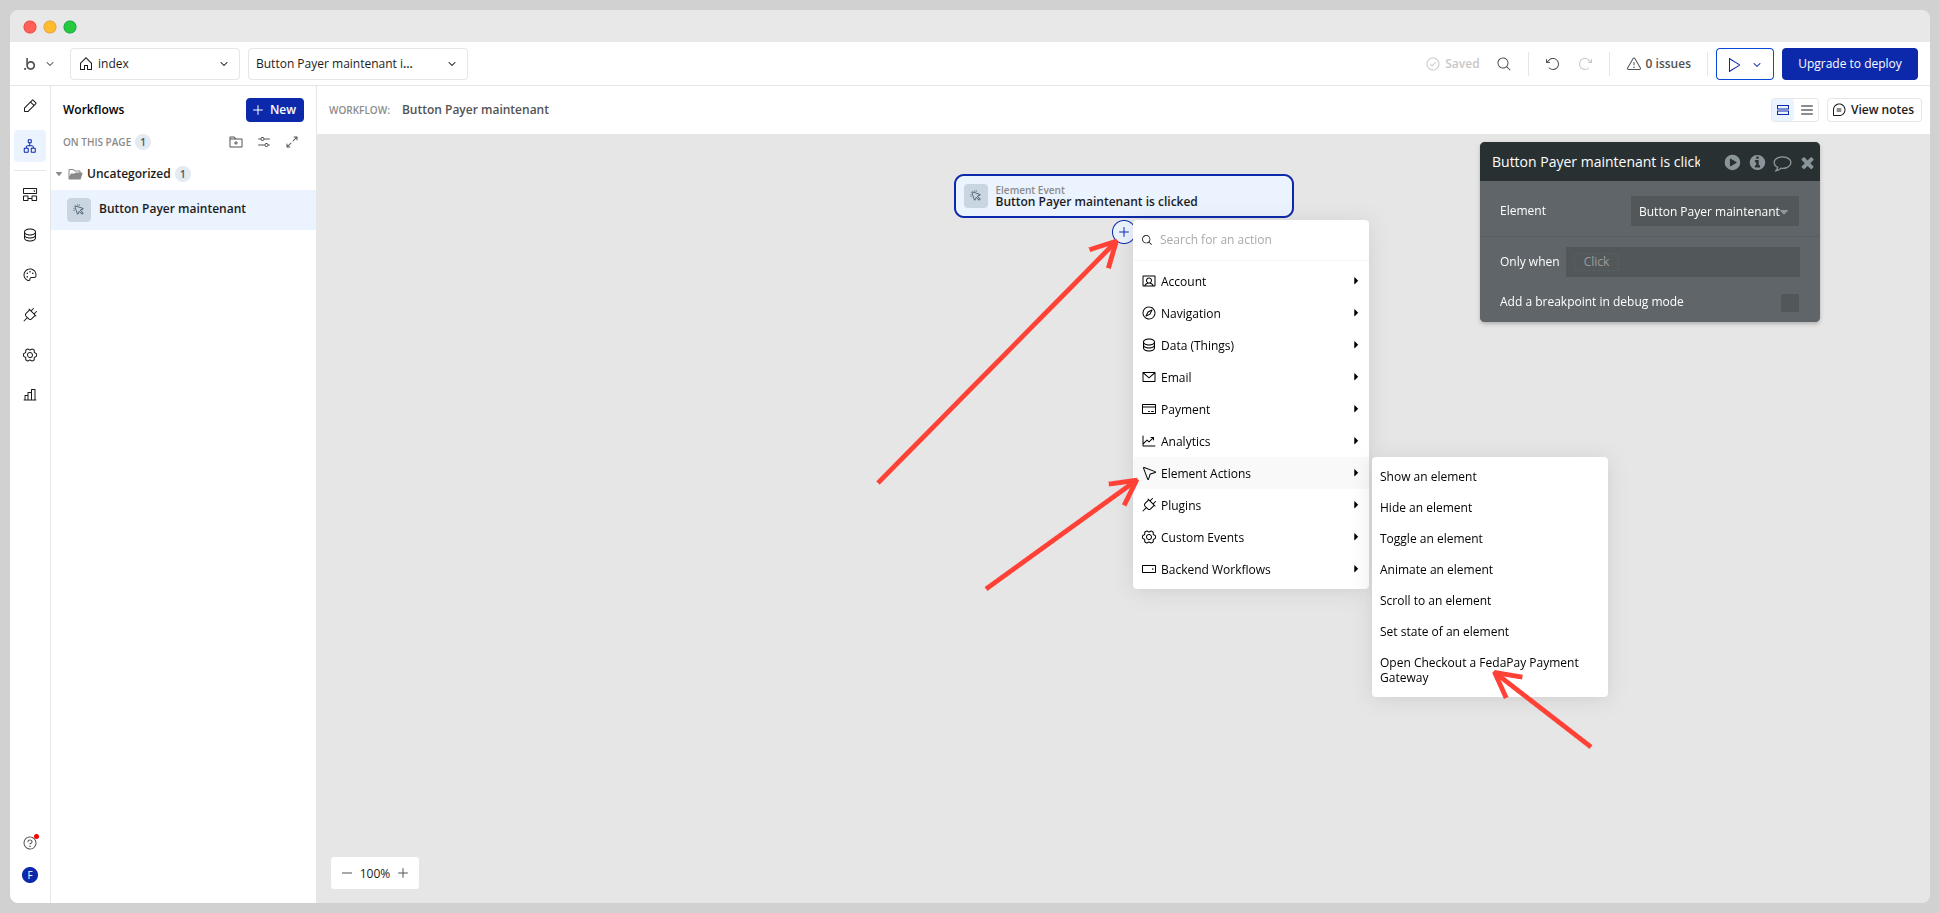
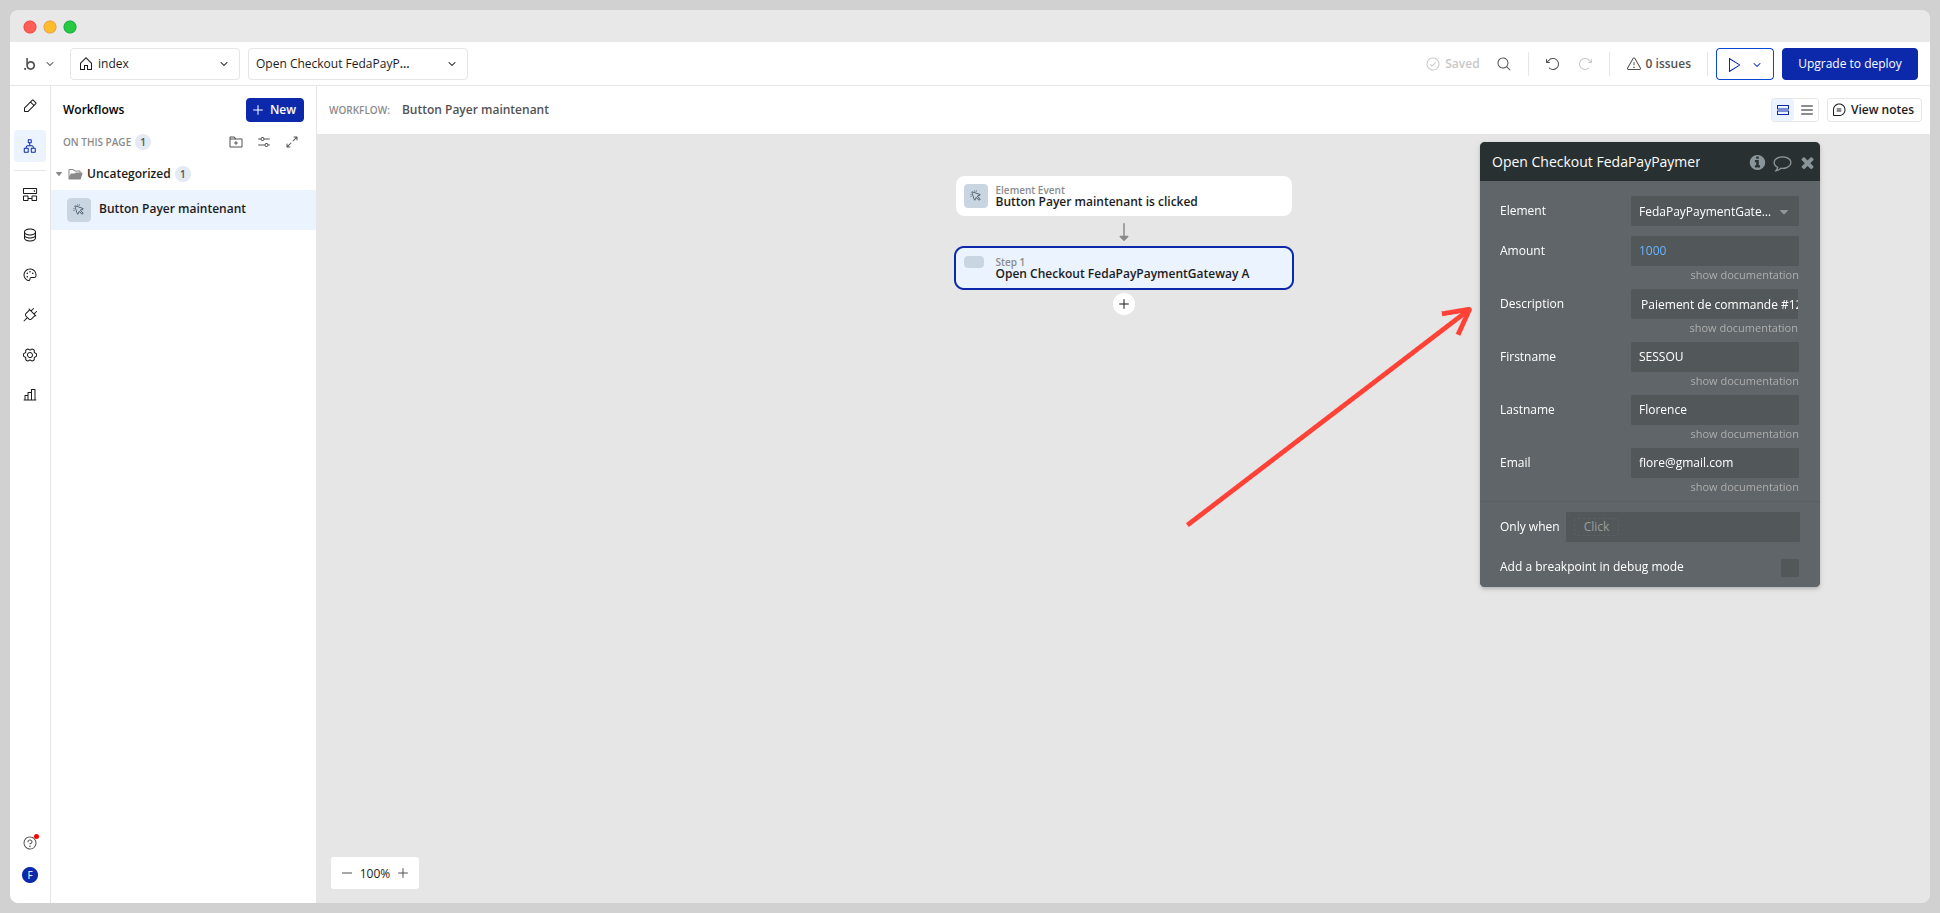
- Amount (Required): the amount to pay (e.g., 1000)
- Description (Optional): “Order payment #123”
- Firstname / Lastname (Optional)
- Phone number (Optional, useful for Mobile Money)
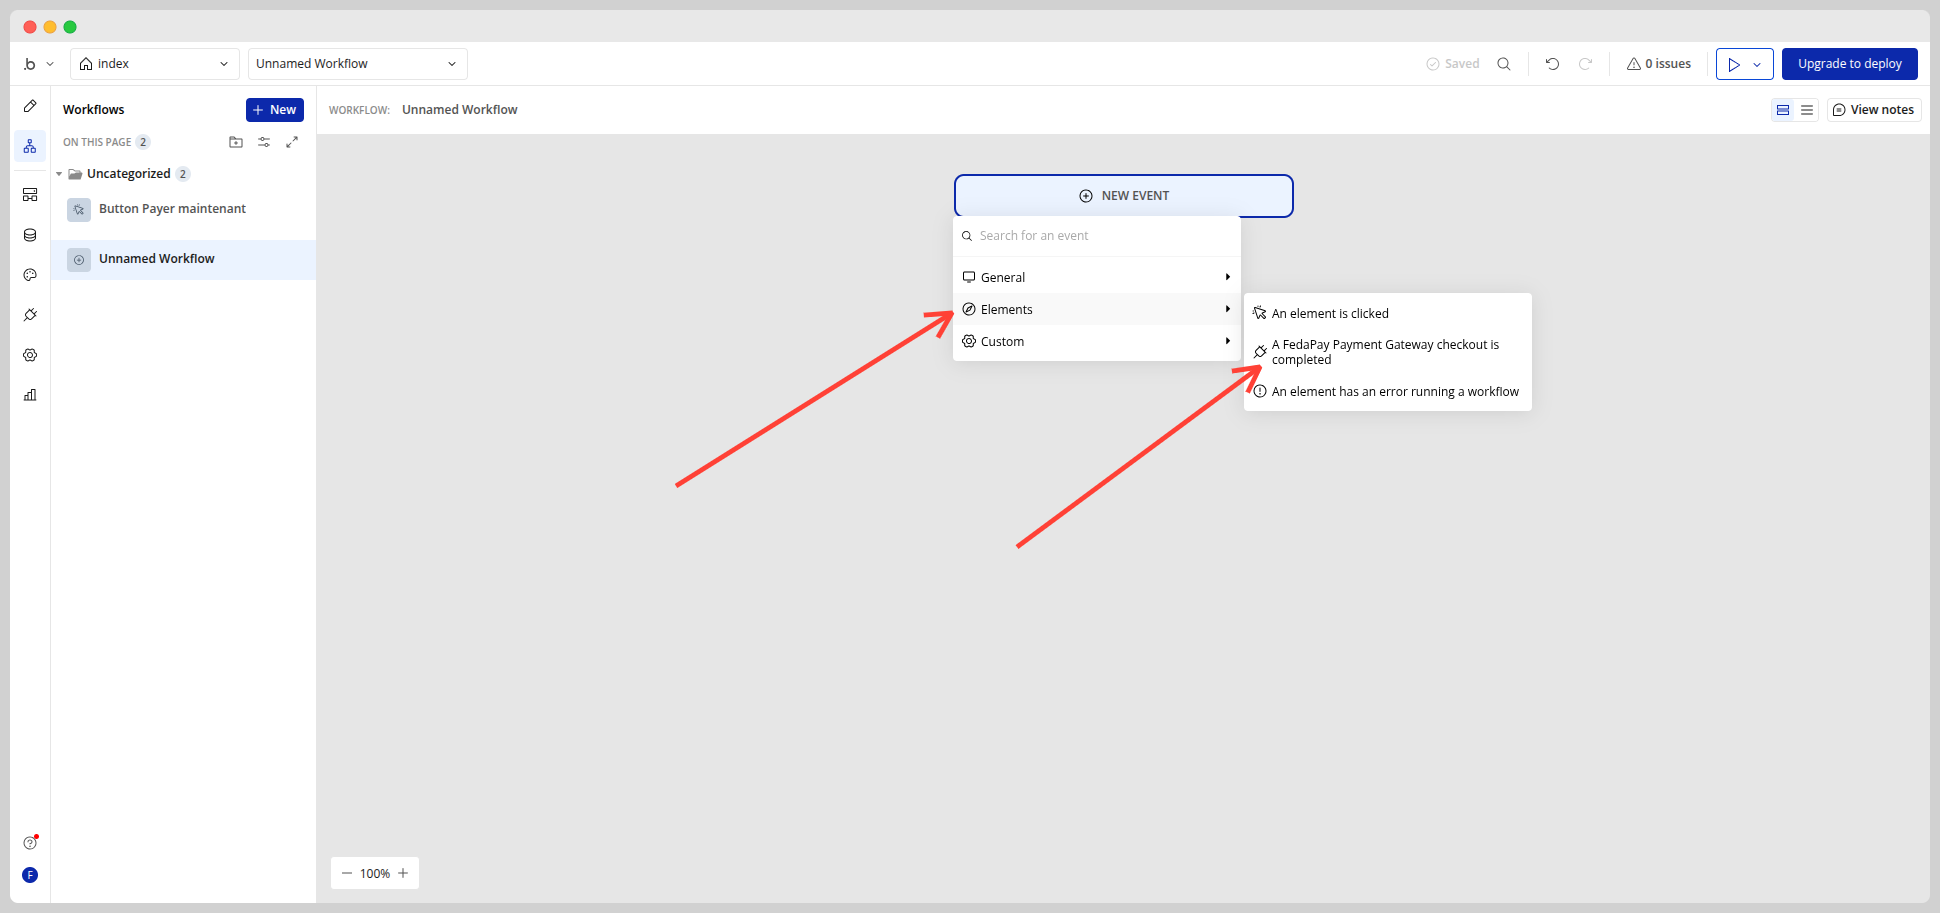
Step 5 : Handle payment success
Once the user completes the payment via FedaPay, the checkout_completed event is automatically triggered in Bubble. What to do after payment? You can use this event in your workflow to:- Save the transaction in your database
- Send a confirmation email
- Display a success message to the user
- transaction_id
- amount
- customer_email
- customer_firstname
- customer_lastname
Step 6 : Test the plugin in a demo app
Want to see what it looks like before implementing it yourself?Check out the demo editor here: Demo Application Link
About the collected data
The FedaPay plugin only collects the information entered by the user during payment (first name, last name, email).This data is returned to you after the payment so you can:
- Create or update a user profile
- Send a confirmation
- Perform data analysis