Create a New Payment Page
To add a new payment page: 1- Click on “Add a page”. 2- Fill in the following information:- Page name: Give a title to your payment page.
- Description: Briefly describe the purpose of the collect.
- Image: Add an image to personalize the page (optional).
- Fixed amount: If you wish to set a fixed amount for the payment.
- Phone numbers: If you prefer to collect the payers’ phone numbers.
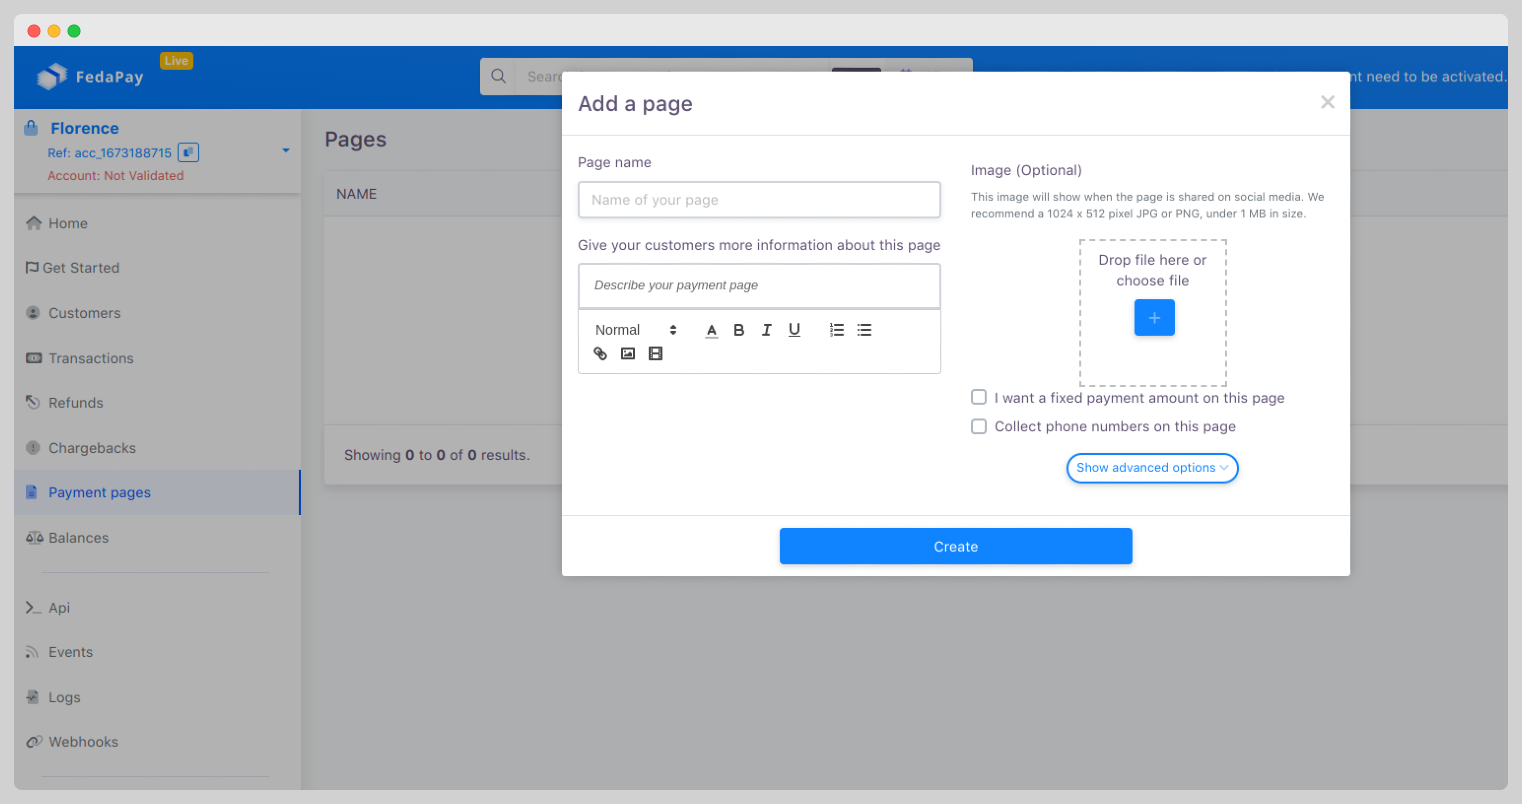
Advanced Options
To further customize your page, you have access to advanced options:- Custom link: Create a unique link to share your payment page.
- Successful payment message: Customize the message that will appear after a successful payment.
- Return link: Provide a return link to your website or a specific page after the payment.
- Additional information: Choose additional information to collect on the page (e.g., a discount code, an address, etc.).
- Create your own template: For a personalized format.
- Events and tickets: Set up payments for specific events.
- Accept donations: Create a dedicated page for donation collection.
- Selling products and services: Set up a page for online sales.
Managing Payment Pages
Once your pages are created, you can easily sort and organize them using:- The Filter button, which allows you to sort pages by Name, Description, or Custom link.
Key Takeaways
- Create customized payment pages to manage your collects.
- Personalize each page with advanced options to meet your needs.
- Organize and filter your collects pages for optimal tracking.