Home: Overview of Your Collects
Upon logging in, you’ll be greeted by an overview of your activity. This page presents charts with key statistics:- Gross Collects Volume : Total amount collected.
- Number of Refunds : Total number of refunds processed.
- Successful Collects : Volume of successfully completed transactions.
- Payment Volume by Method : Compare payment methods across different periods (yesterday, last 7 days, last month, last year).
- Number of Payments by Method : Display the number of payments by each method, adjusting the time periods as needed.
Clients: Managing and Tracking Client History
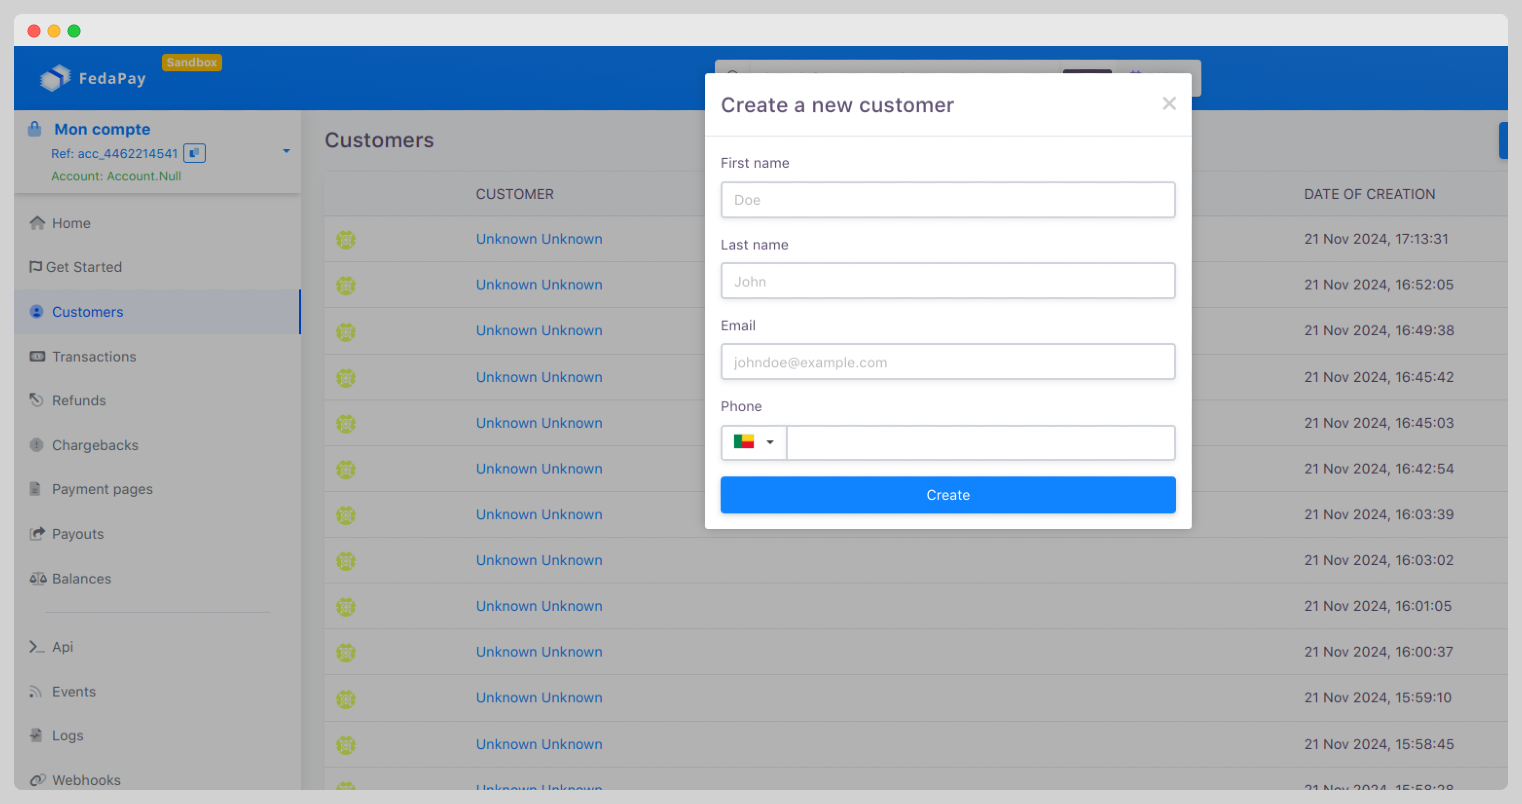
The client management section simplifies handling your clients. You can:- Add a Client : Click on the New Client button, fill in the form (name, email, phone number), and click Create.
- Edit or Delete a Client : Next to each client, buttons allow you to modify information or delete the client from the list.
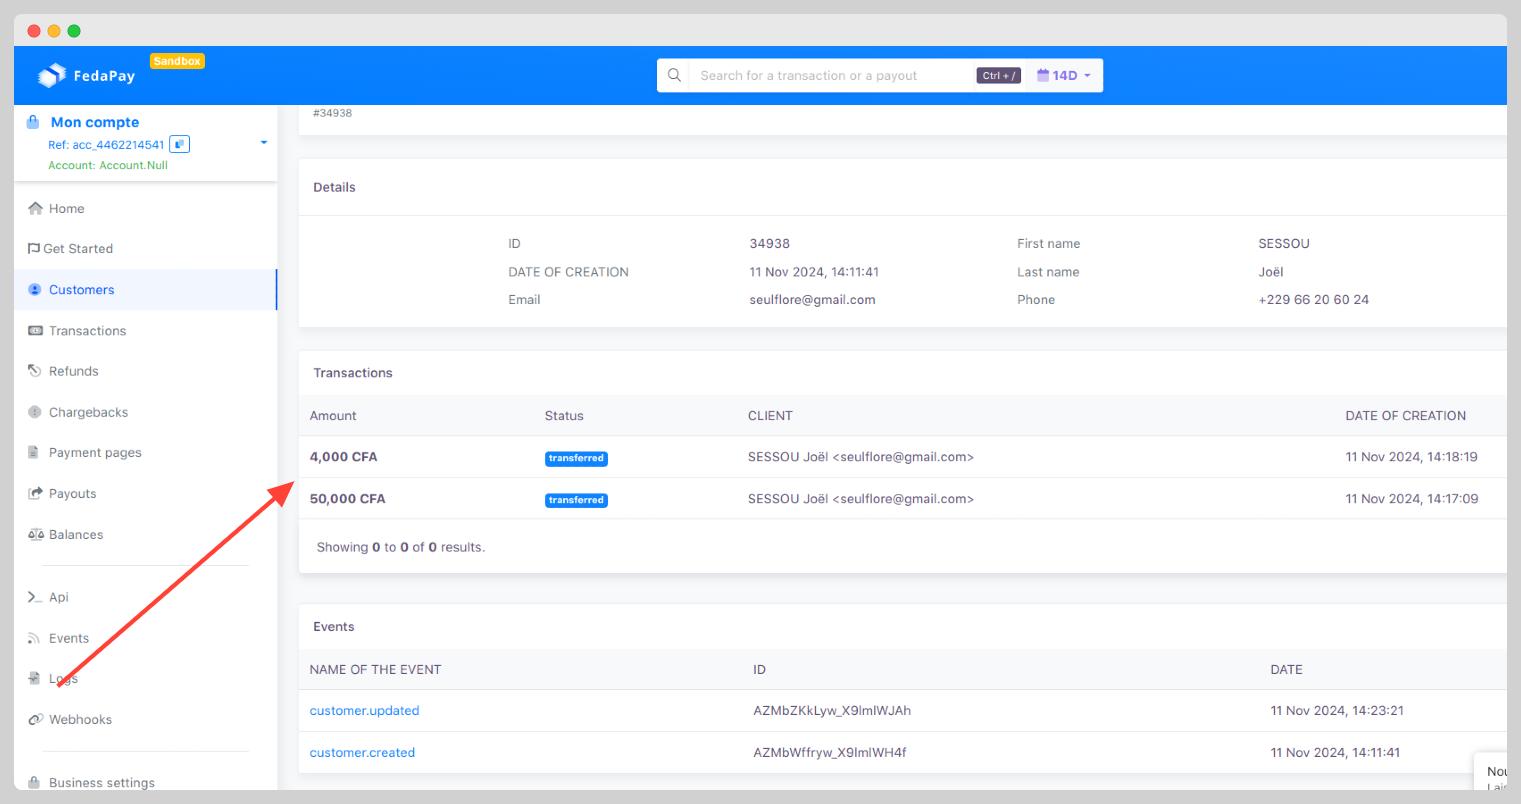
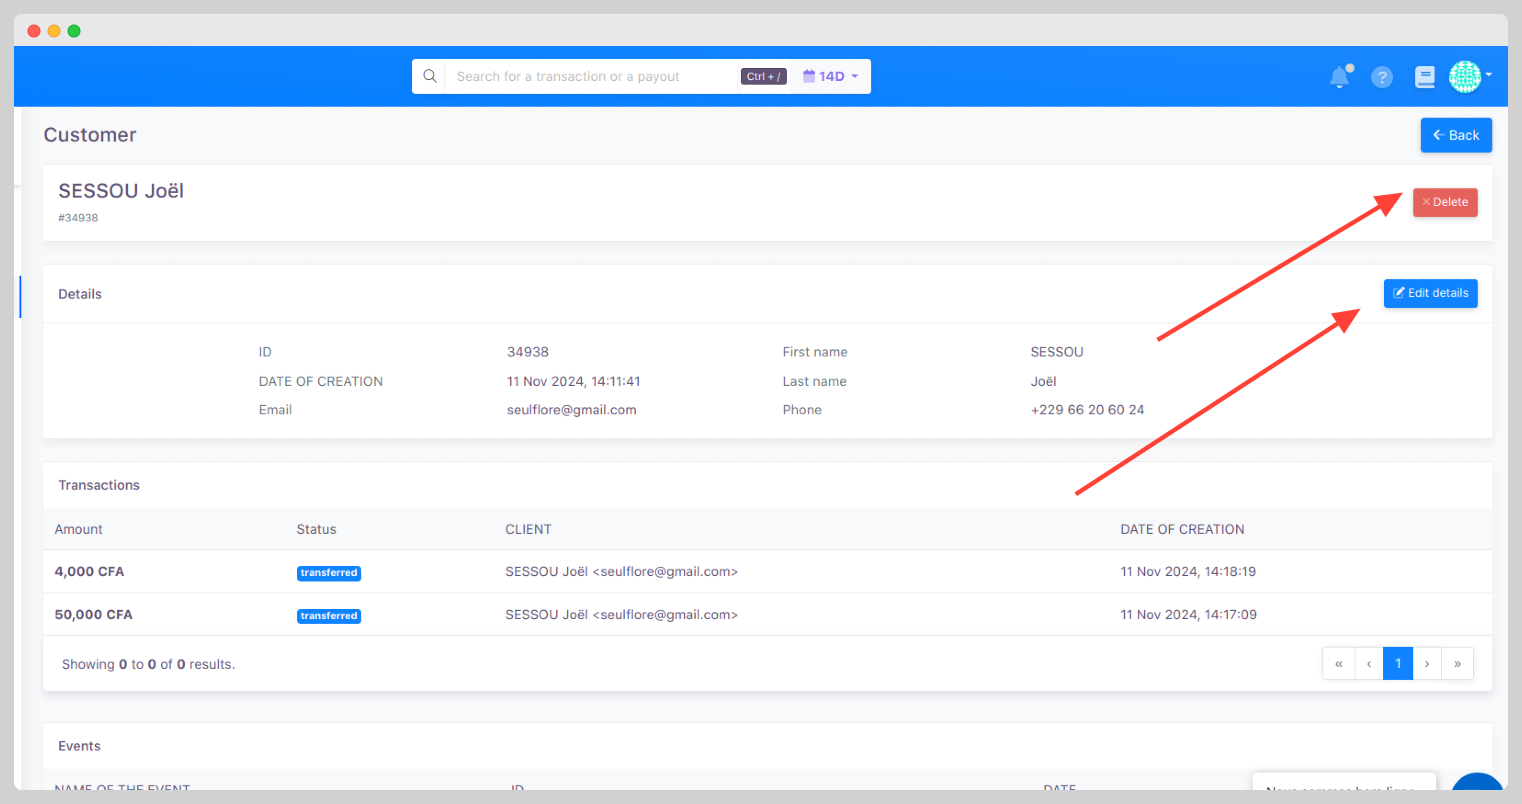 View a Client’s Collect History : Track the collections and events related to each client.
 For easier management, a filter button allows you to sort clients by name, email, or creation date. You can also export the client list to CSV for advanced analysis.
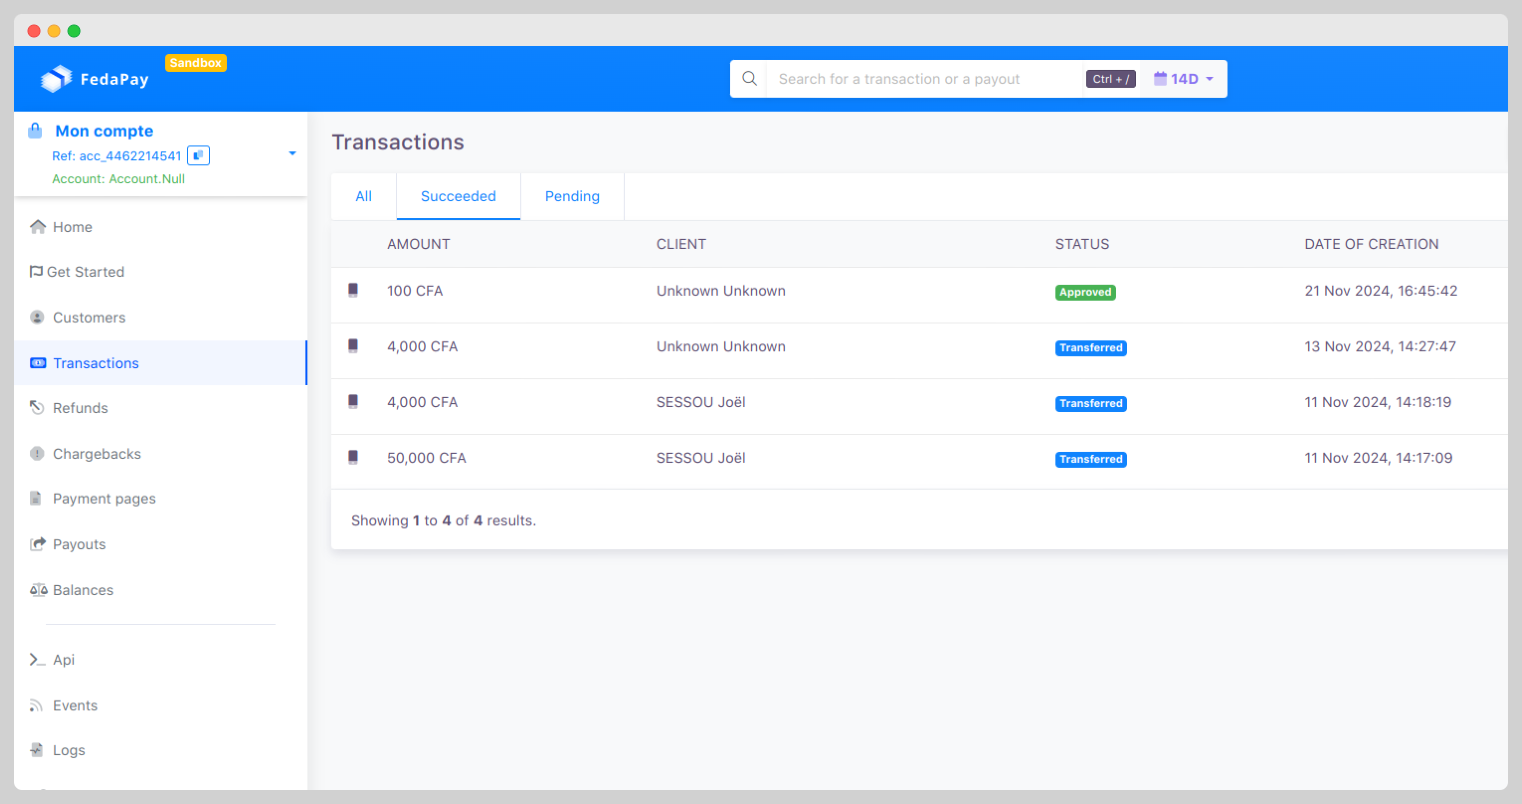
Collects: View and Manage Your Transactions
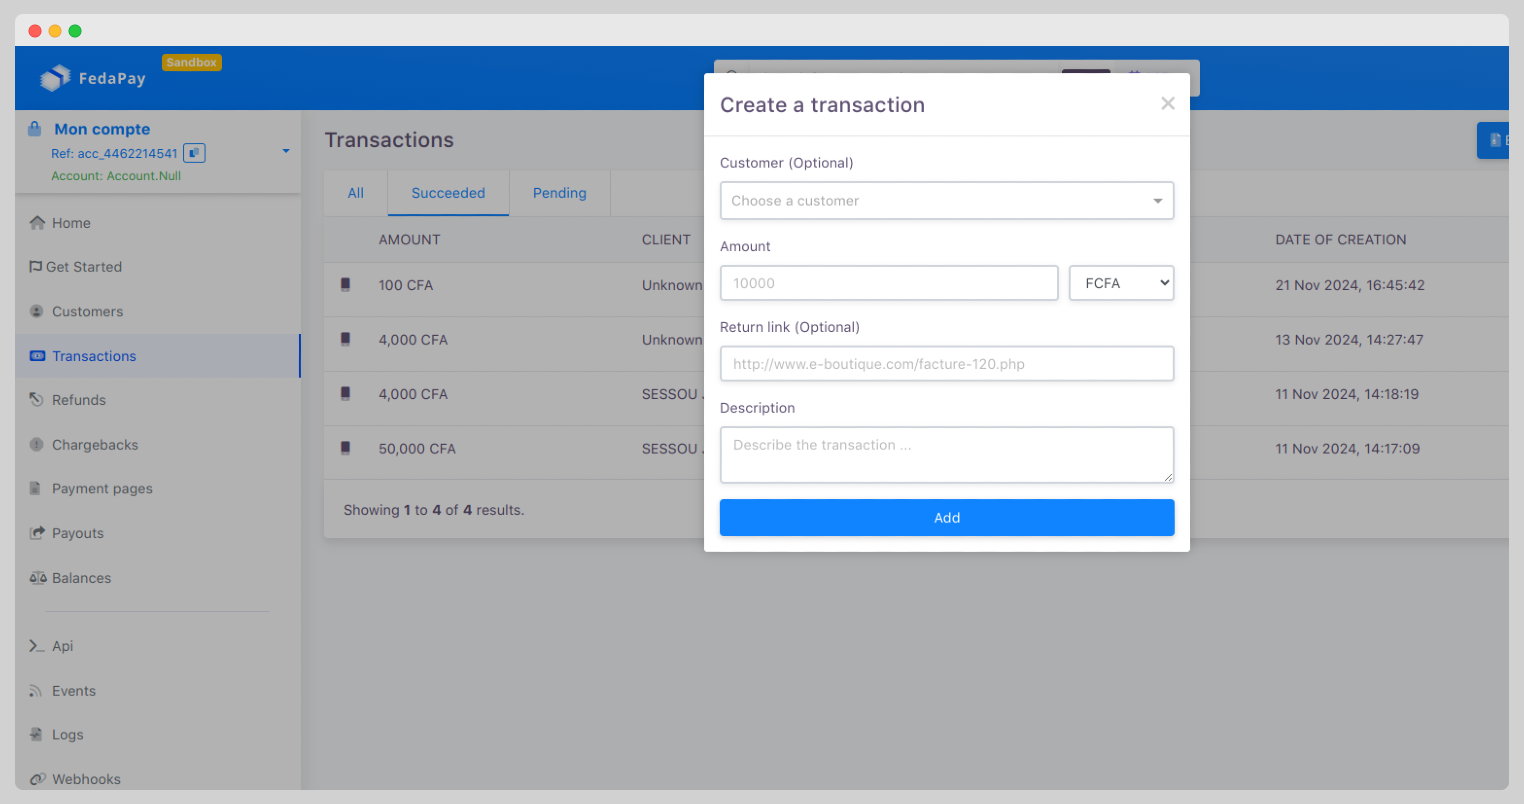
The Collects section helps you view and organize all your transactions. Collects are categorized into three types: All, Successful, and Pending. Creating a New Collect To record a new collect:- Click on Add a Collect.
- Fill out the form (select client, amount, currency, and optional description).
- Click Add to complete.
 Viewing Collects
To view your collects :
Click on Collects in the menu.
A list of all collects appears, including amount, client, status (pending, completed, failed), and creation date.
Viewing Collects
To view your collects :
Click on Collects in the menu.
A list of all collects appears, including amount, client, status (pending, completed, failed), and creation date.
 Modifying or Deleting Collects
You can modify a pending collection by selecting the Edit Details option. To permanently delete a collect, click Delete. A filter button and CSV export option help organize and analyze collects based on various criteria (ID, reference, amount, status, payment method, etc.).
Modifying or Deleting Collects
You can modify a pending collection by selecting the Edit Details option. To permanently delete a collect, click Delete. A filter button and CSV export option help organize and analyze collects based on various criteria (ID, reference, amount, status, payment method, etc.).
Refunds: Tracking and Filtering
In the Refunds section, find details about your refunds, such as:- Refund Amount
- Beneficiary
- Status
- Refund Date and Creation Date
How to initiate a refund?
To process a refund from your FedaPay merchant dashboard, follow these steps:Click on 'transaction X' to view its details and check its status.
If the status is Approved, you can proceed with the refund.
Important note : Refunds can only be processed via MTN Mobile Money.
Holdings: Information on Held Funds
The Holdings section provides a summary of held funds:- ID
- Amount
- Balance
- Creation Date
Payment Page: Create and Manage Collect Pages
The Payment Page section is for creating customized payment pages for your products or donations. Each page includes four information fields (Name, Amount, Status, Date). Creating a New Payment Page- Click Add a Page to open the form.
- Fill in the page name, description, and image (optional).
- Choose between a fixed amount or the option to collect phone numbers on the page.
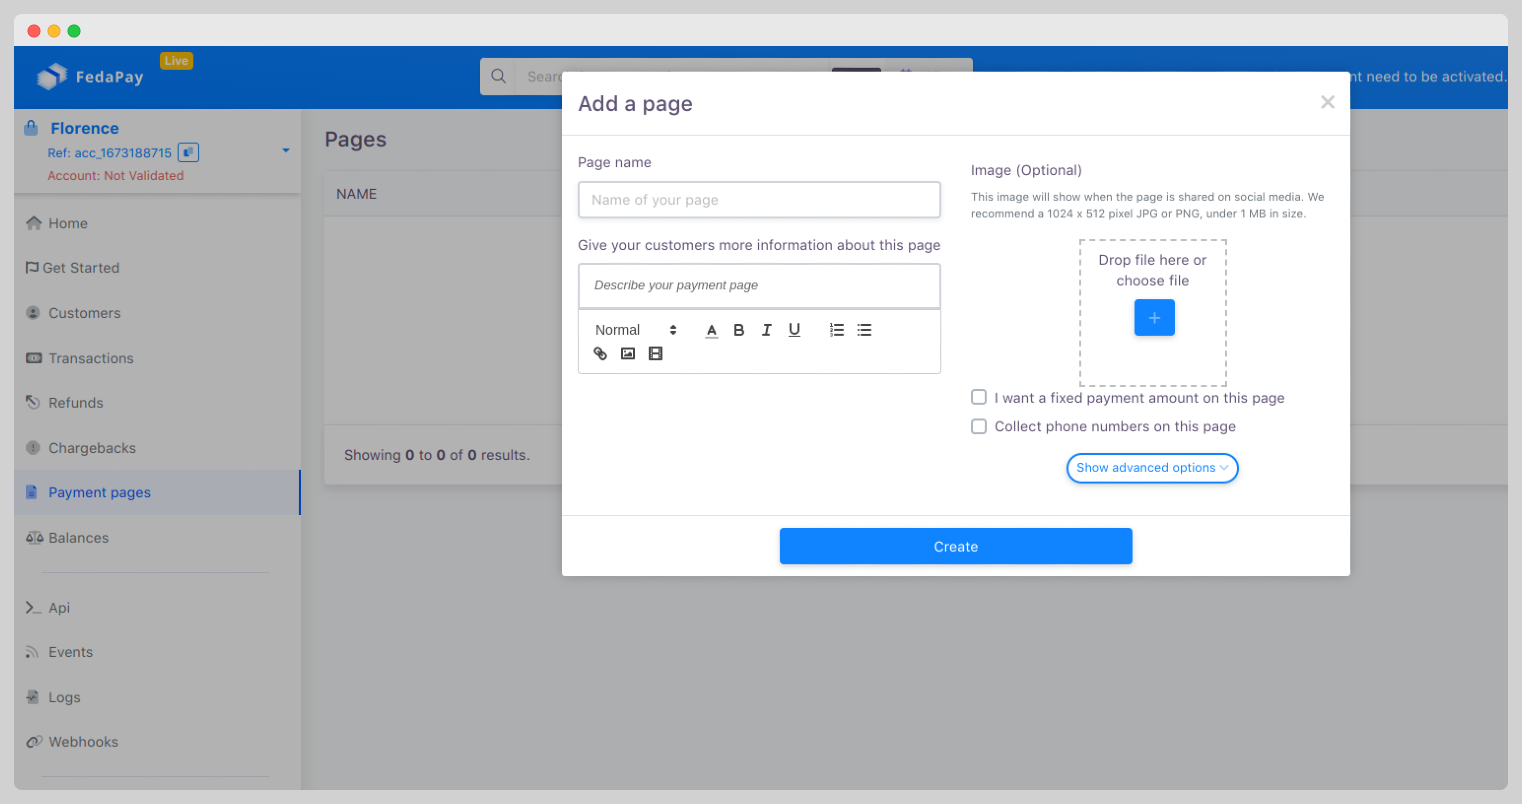 Advanced options allow you to set a custom link, success message, return link, or additional information to collect. Customize the description with options like:
- Create your own template
- Events and tickets
- Accept donations
- Sell products and services
Payouts: Schedule Withdrawals
With FedaPay, you can not only receive payments from your clients but also make payouts to them from your FedaPay account. This service automates the financial operations of your business, whether for paying employees, suppliers, or partners via one-time or scheduled transfers.Note: This feature is available upon request. Please contact support at
support@fedapay.com .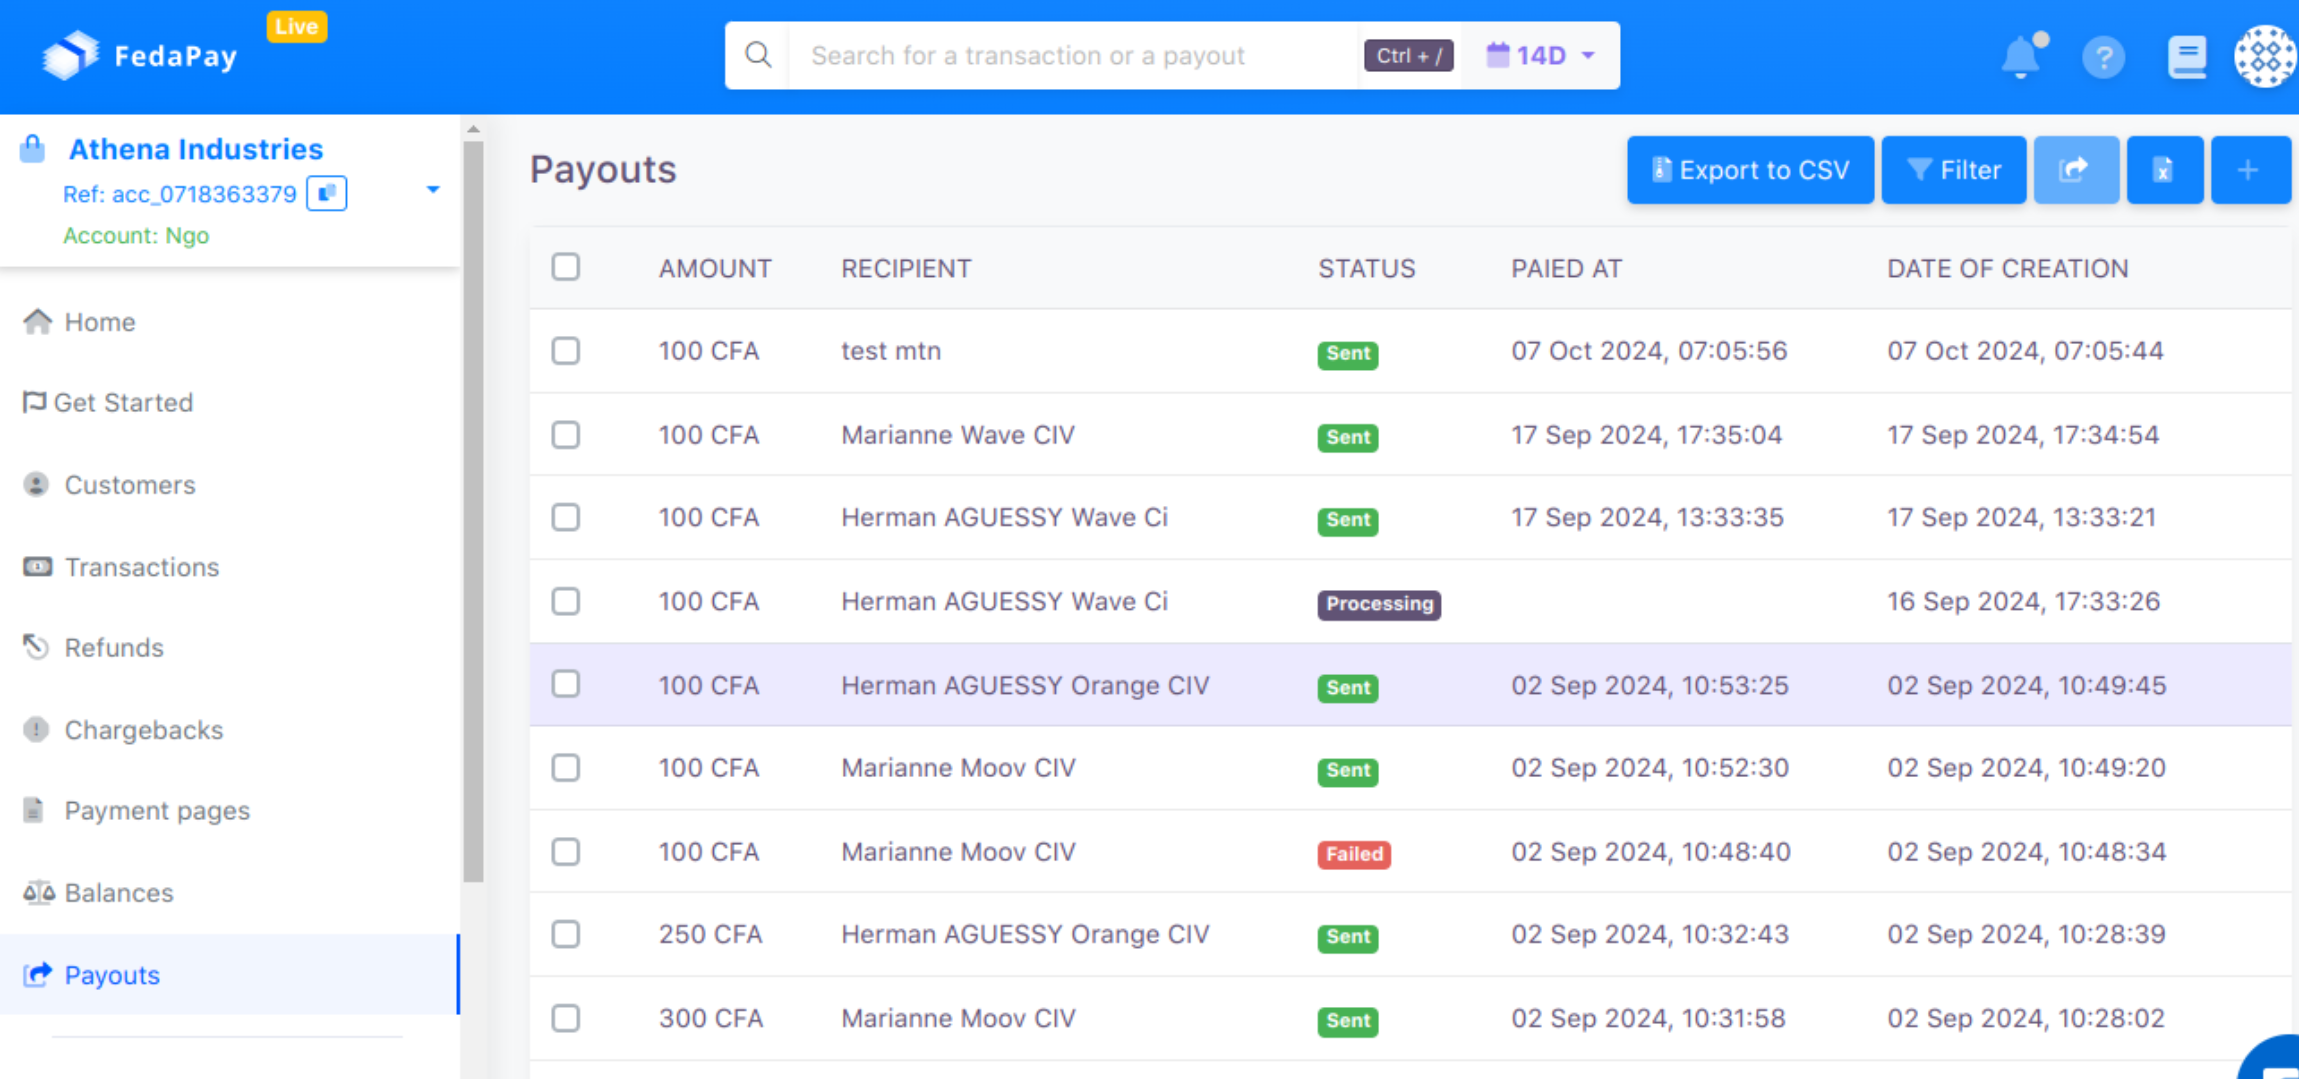 You can use filters to sort and search for completed or scheduled deposits.
Add a Payout
To add a payout, you have two options:
You can use filters to sort and search for completed or scheduled deposits.
Add a Payout
To add a payout, you have two options:
-
Single Payment
- Click Add a Payout.
- Enter the recipient and amount to transfer.
- Confirm by clicking Add.
-
Multiple Payments
- Ideal for managing several deposits to one or more recipients, on the same or different dates.
-
Prepare a CSV file containing the payout information with the following columns:
- First Name, Last Name, Email, Phone Number, Amount.
- Download a sample file here.
- Click Import CSV and select your file to load the list of payouts.
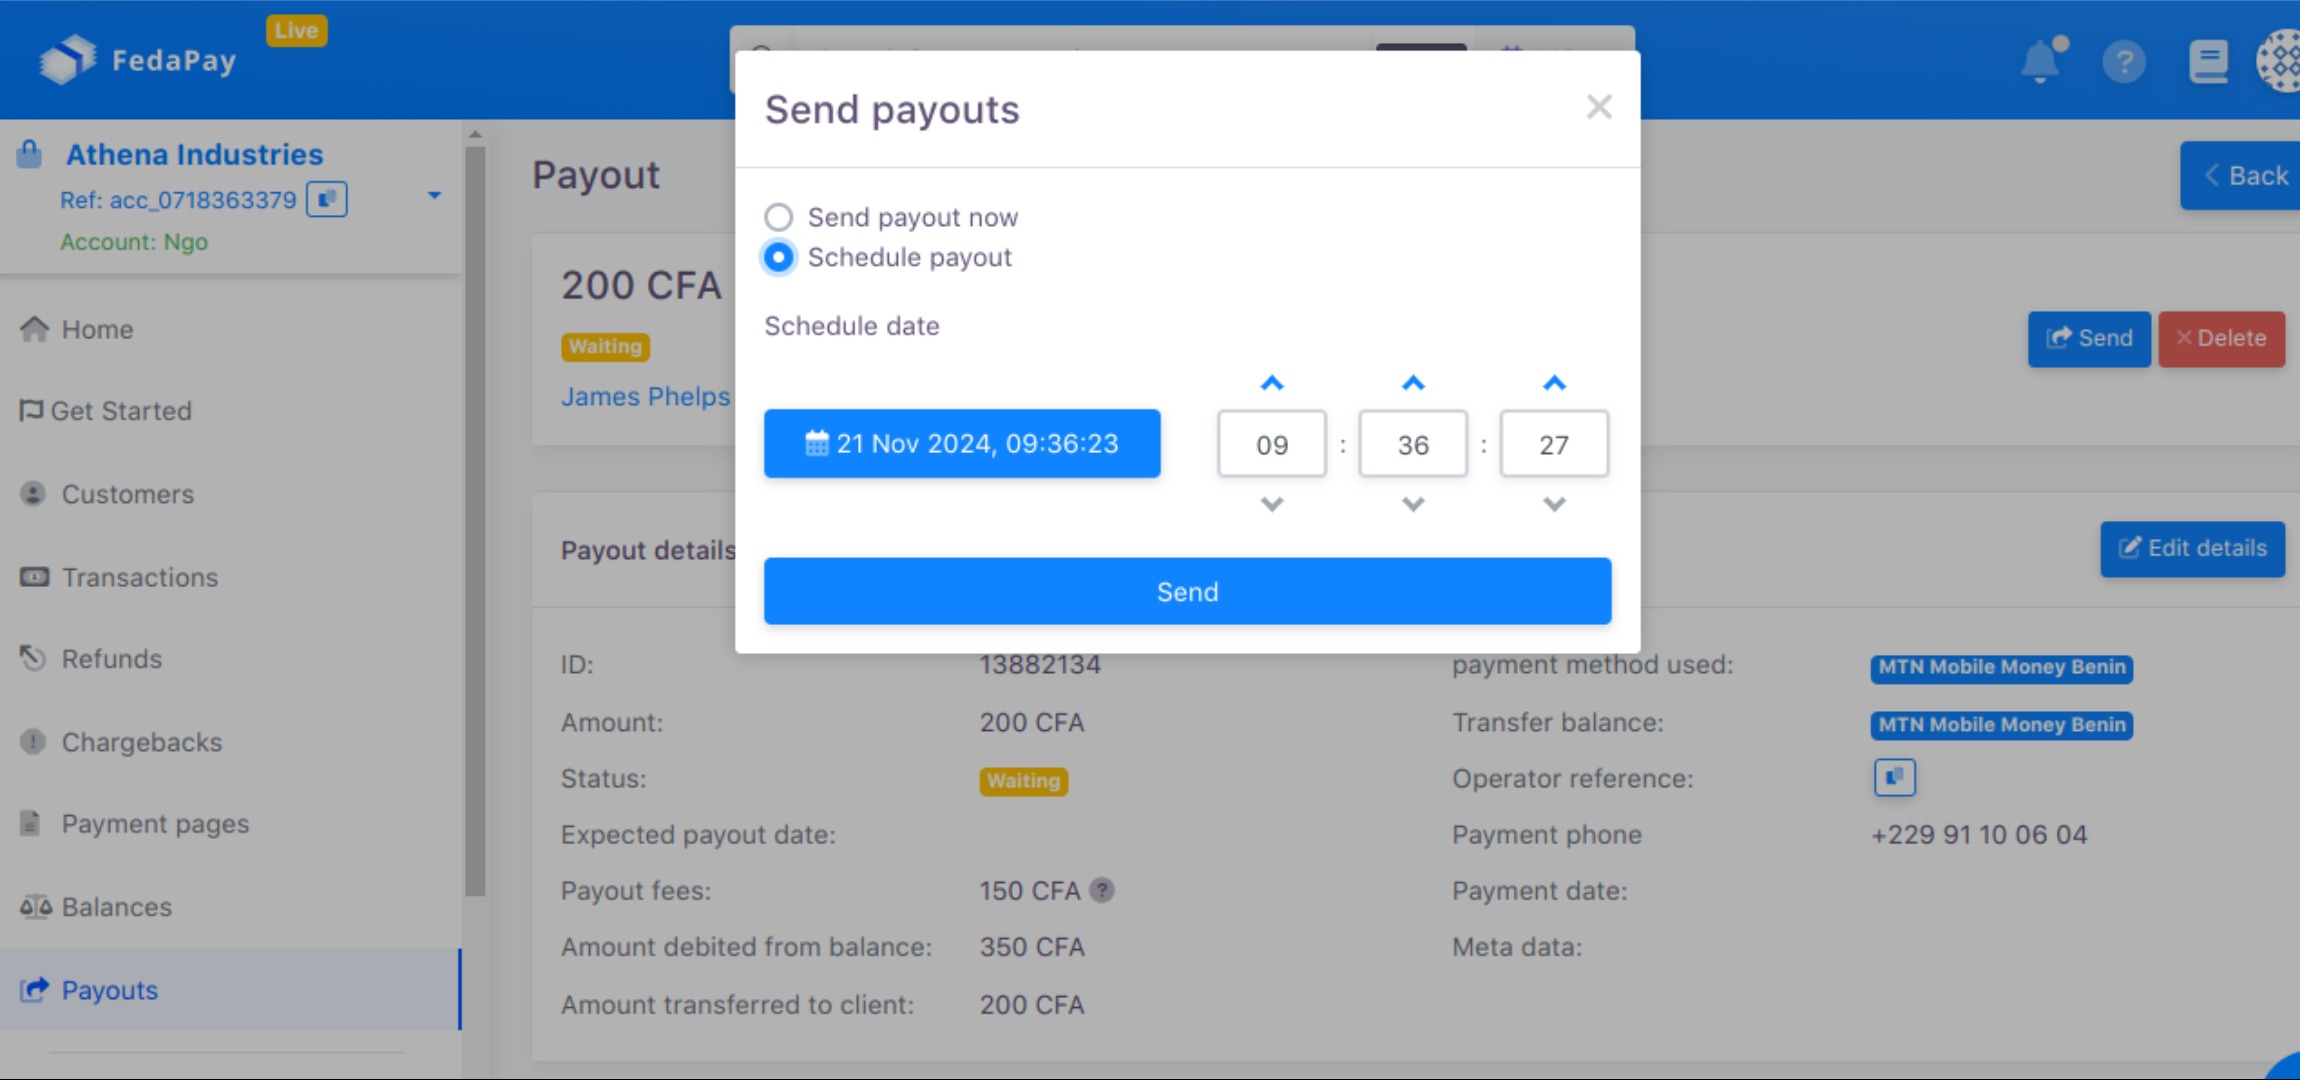
- Click Send next to a specific payout.
- Choose Send Now or Schedule Send for a specific date and time.
 Multiple Send
- Select multiple payouts by checking the corresponding boxes or check Select All to include all payouts on the page.
- Click Send to initiate the selected payouts.
- Send Now : For immediate sending.
- Send All Payouts on Same Date : Ideal for global payouts on a specific date.
- Send All Payouts on Different Dates : Schedule each payout according to the dates in the CSV file.
API, Events, Logs, and Webhooks
- API : Generate and manage your API keys (public and secret) by clicking Regenerate API Keys.
- Events : Access details of collects and events via the Webhooks and Events page.
- Logs : Track your activity logs for each collection with status, description, and date.
Profile Management and Security
Click on your profile in the top-right corner to access settings for managing:- Profile : Modify your first name, last name, language, change your password, and enable two-factor authentication (2FA).
- Login Activities : View your previous logins with connection status (Success in green or Failure in yellow). Use filtering options (IP, city, region, country) to refine your search.
Business Settings
The Business Settings in your FedaPay account allow you to configure and validate your information to receive transfers to your bank accounts, mobile money, or prepaid cards. Here’s a structured guide to help you navigate this section. Accessing Business Settings From your FedaPay account dashboard, go to the menu Business Settings. An interface with five main tabs will appear to help you configure different types of accounts.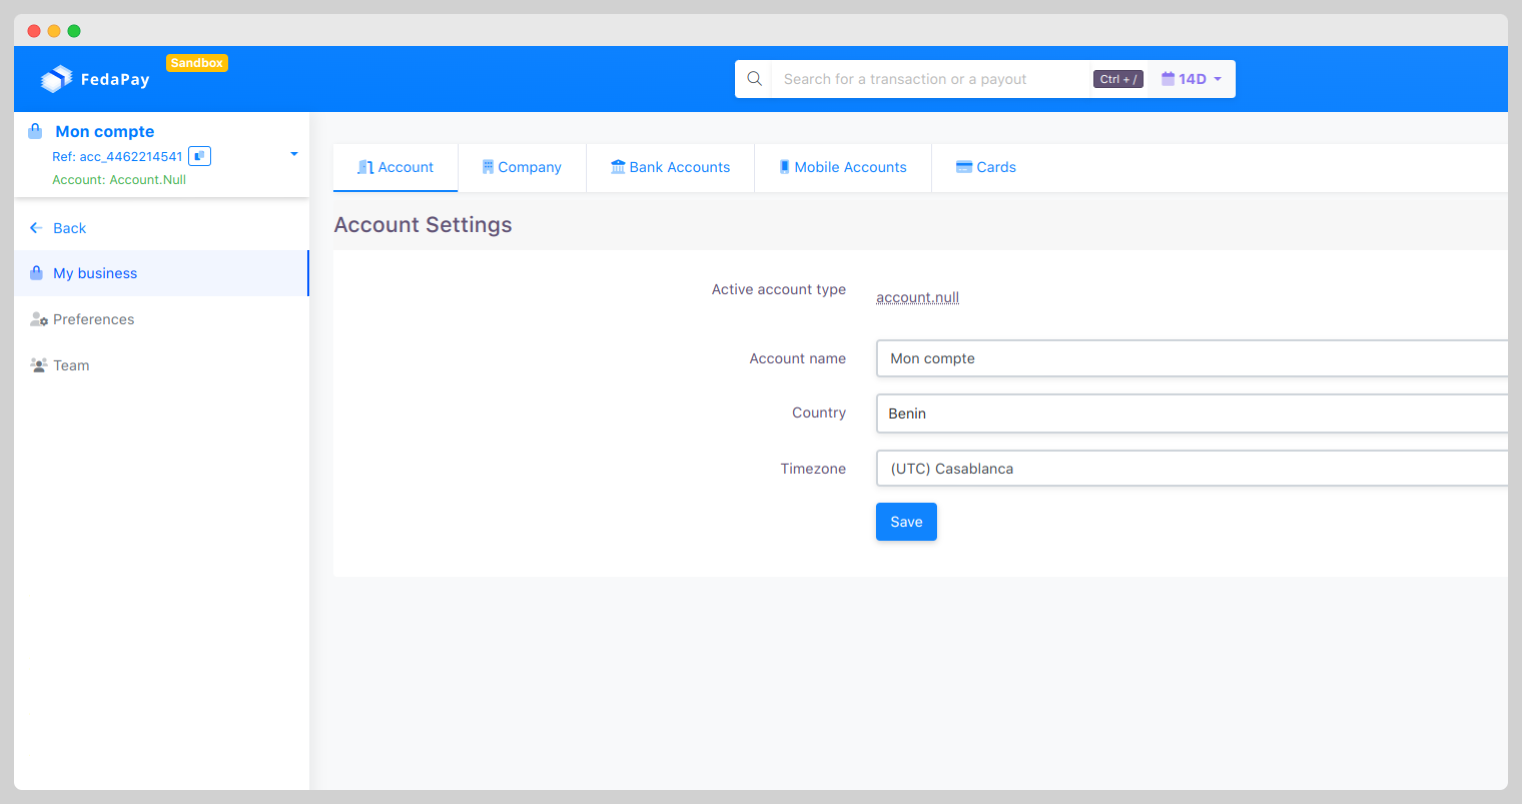
Account
This tab allows you to manage general details of your FedaPay account.- Account Name : Edit the name of your FedaPay account.
- Country and Time Zone : Select the country where your business is registered, as well as your time zone.
Tip: Don’t forget to click Save to save your changes.
Business
In this tab, enter the necessary information to identify your business and validate your FedaPay account.- Business Name
- Business Address
- Business Registration Number
Tip: Complete all fields and click Save to successfully validate your account.
Bank Accounts
This tab allows you to add bank account information to which you want to transfer your earnings via bank transfer. Add a Bank Account :- Click Add a bank account.
- Fill out the form with the following information :
- Bank Name
- Country of Bank (where your account is domiciled)
- Account Title (as indicated on your bank statement)
- Account Number (IBAN) and SWIFT Code
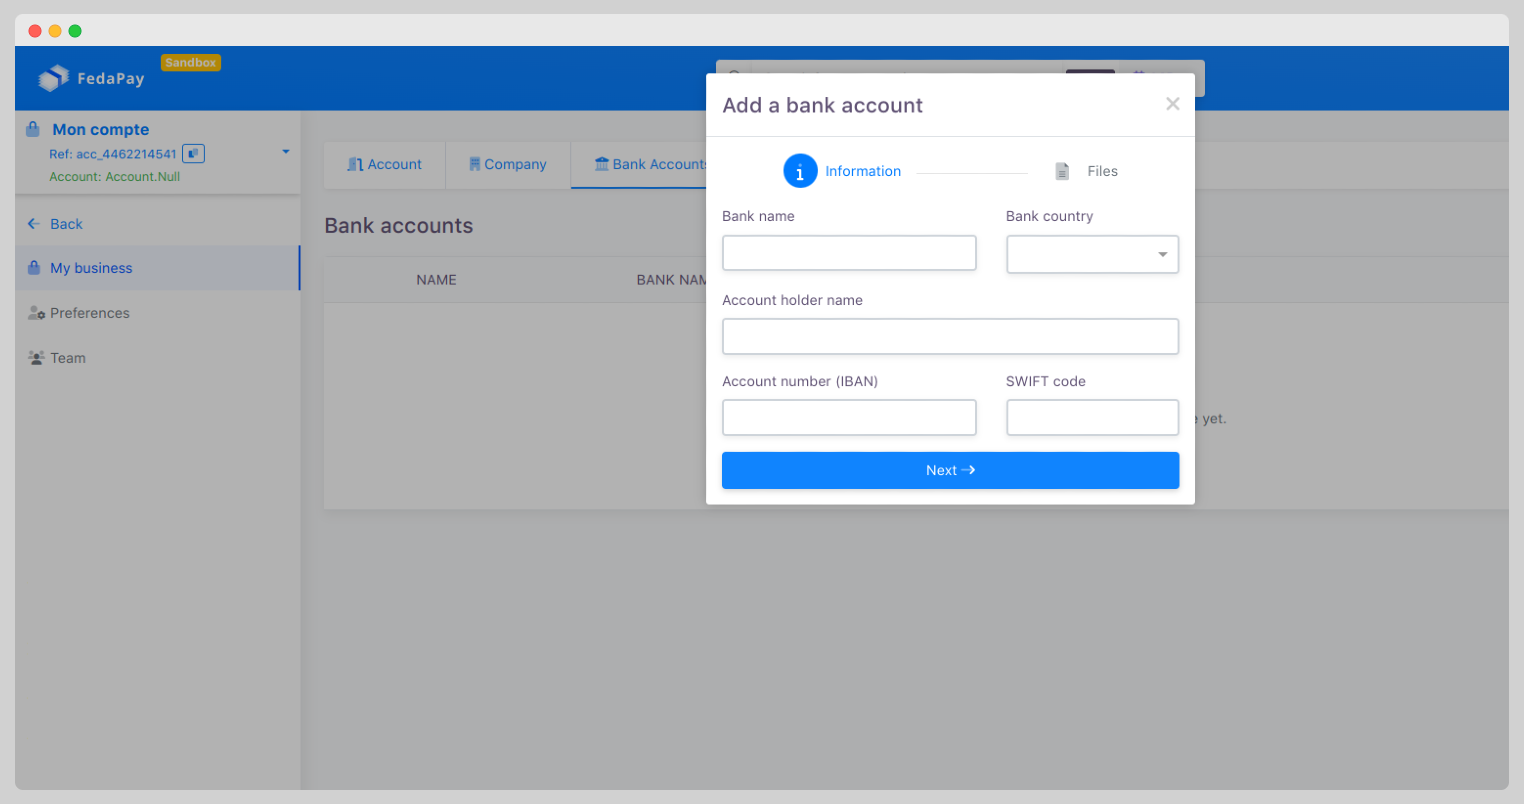 Once you’ve filled in this information, click Next to move on to the documents stage.
Documents :
Once you’ve filled in this information, click Next to move on to the documents stage.
Documents :
- Identity Document Type (ID card or passport)
- Identity Document: Upload a copy of the selected document.
- Bank Statement (RIB): Upload a copy of your bank statement.
Mobile Money Accounts
In this tab, set up mobile money numbers to which you’d like to transfer your earnings. The supported payout methods for deposits currently include MTN Benin, MTN Ivory Coast, Moov Benin, Moov Togo, and Togocel. Add a Mobile Money Account :- Click Add a mobile account.
-
Complete the form with the following details :
- Mobile Money Account Holder (Full Name)
- Country Code and Mobile Money Number
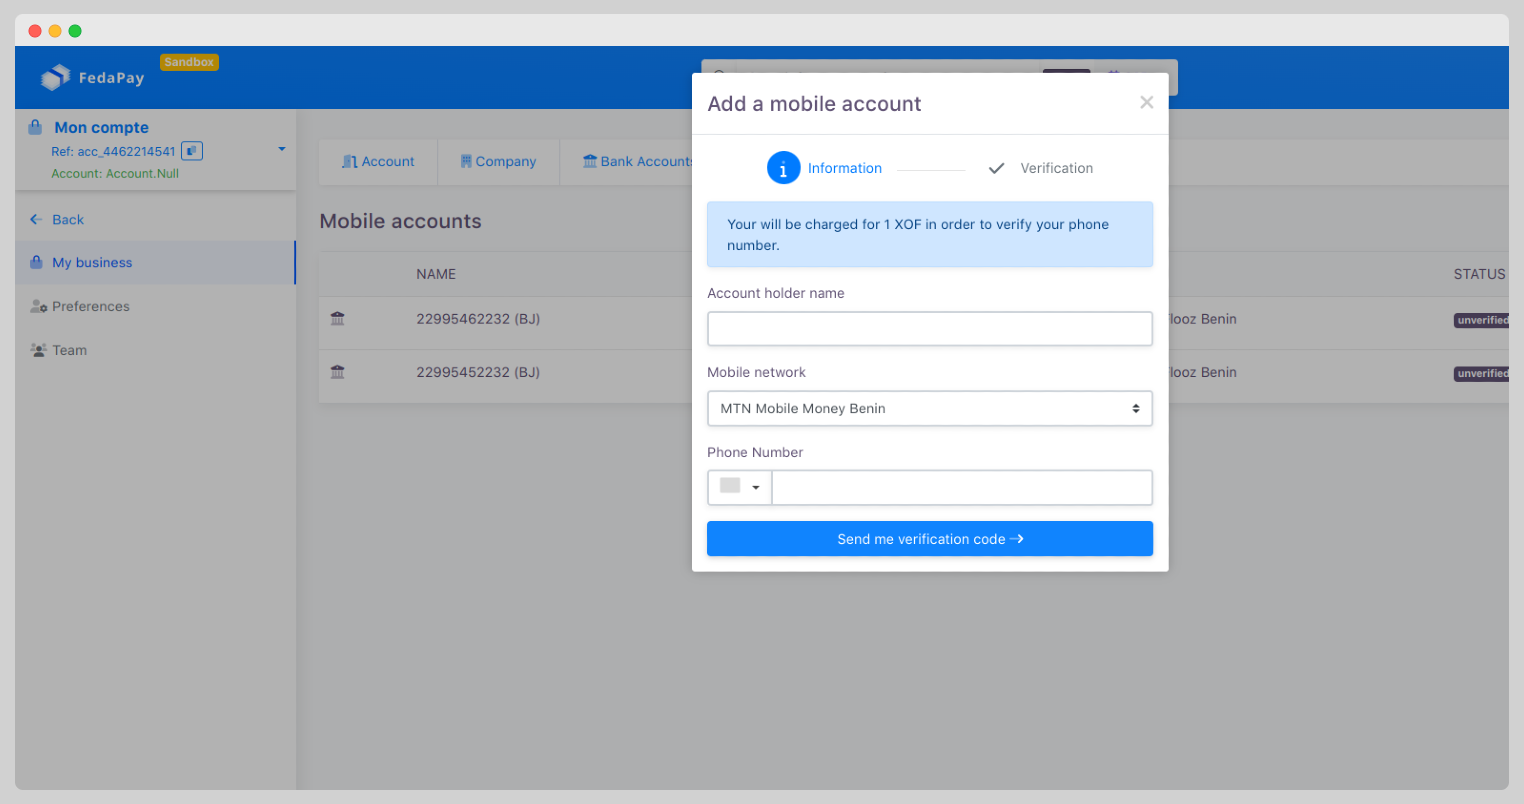
- Click Send Verification Code.
- Enter the verification code received via SMS in the designated space and click Verify.
Preferences
To set your preferences, go to Business Settings > Preferences in the dashboard. You’ll see an interface with five main tabs that allow you to personalize various aspects of your account: Payment Methods, Fees, Currencies, Notifications, and Payment Page.- Payment Methods : View the list of payment methods available through FedaPay and activate those you want to offer your clients.
- Fees : Choose how to handle transaction fees. Check the boxes of the payment methods where you want clients to cover the fees. Uncheck if you prefer to cover them yourself.
- Currencies : Enable the currencies you want to offer. Options include Euro (EUR), Guinean Franc (GNF), and CFA Franc (XOF).
- Notifications : Customize the notifications you want to receive regarding transactions.
- Approved
- Canceled
- Declined
- Transferred
- Payment Page : Customize the look and content of your payment page by clicking on the Edit button available for each element on the page. Adjust colors, text, and other elements so that your payment page reflects your brand.
User Management
This section explains how to configure and manage users on your FedaPay account. The goal is to assign specific roles and permissions to your collaborators to secure access to your account and protect sensitive data. Here are the steps to add users, assign roles, and manage permissions.Access the Team Section
Start by accessing your FedaPay dashboard and going to Business Settings > Team.In this section, you’ll find two tabs: Users and Pending Invitations.
Add a User
In the Users tab under the Team section, click Add a User. You can then invite your collaborators to join your FedaPay account.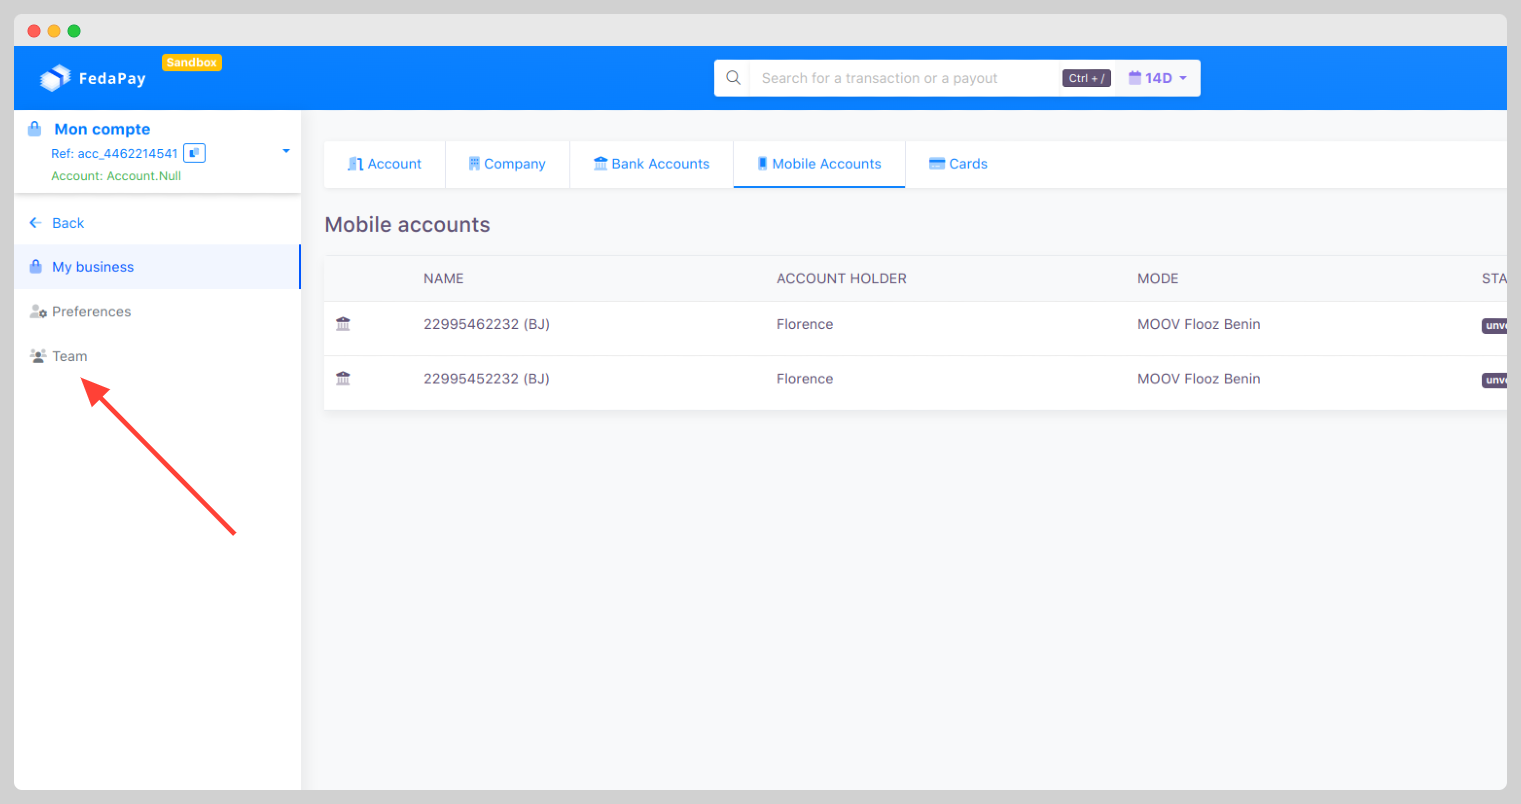
Role Assignment
Each user must have a defined role based on their responsibilities. Here are the three available roles, each with specific levels of access: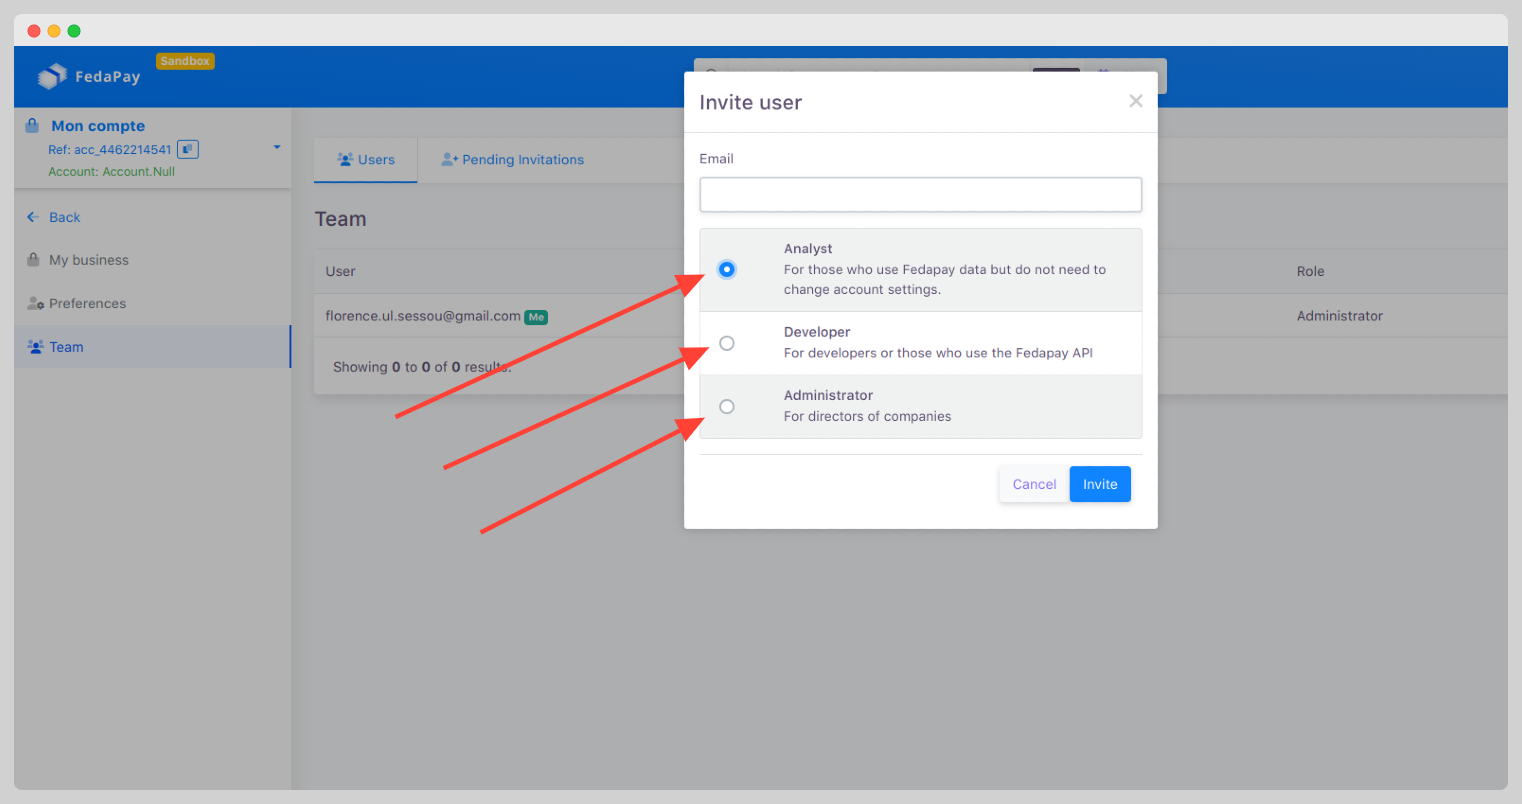
- Analyst: For team members responsible for tracking your business’s financial performance. They can view reports and evaluate transactions.
- Developer : For technical team members, such as programmers, responsible for integrating the FedaPay API or configuring payments on your platform.
- Administrator : Assigned to you as the account owner. The Administrator has full access to manage all aspects of the account.
Invite a Collaborator
Enter the email address of the collaborator you wish to add, select their role, and click Invite.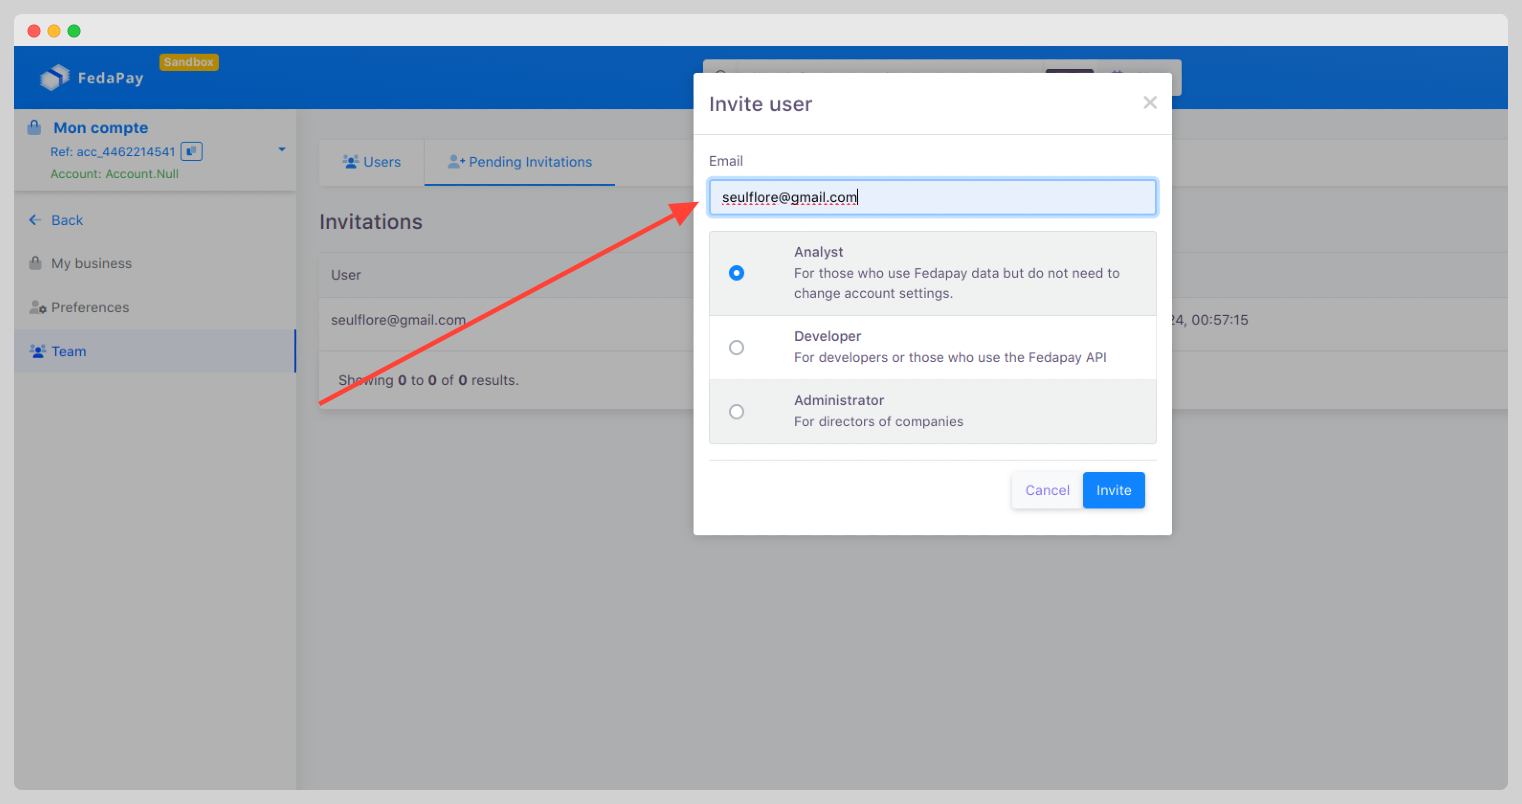

Retrieving and Managing Your FedaPay Funds
This section guides you through the process of withdrawing available funds, currency rules, and managing your payout requests through FedaPay. Here’s how to access your funds and request a payout, step by step.Access Available Funds
Transactions marked as Transferred are available in your merchant account balance. Once a transaction is approved, it will take 72 hours to be transferred to your balance. Steps to access funds :-
Add a withdrawal method (bank account, Mobile Money, or bank card) by going to Business Settings.
- Add a bank account
- Add a Mobile Money number
- Add a bank card
- Once these details are set up, you can start requesting transfers to your accounts or wallets.
Request a Payment
To request a payment, follow these steps:- Select the relevant balance (based on your preferred currency, for example, Euro or CFA Franc).
- Choose the payment method (Bank Transfer, Mobile Money, etc.).
-
Fill out the request form :
- Enter the amount you want to withdraw.
- Select the payment method (bank transfer, Mobile Money, bank card).
- Click Create to finalize your payment request.
Managing Multi-Currency Balances
FedaPay creates a separate balance for each currency used in your transactions (e.g., one for Euro transactions and another for CFA Franc transactions). This means it’s impossible to merge funds from multiple balances for a single transfer request.Important Note: Although you cannot merge funds from different currencies for a transfer, you can receive all transfers into a single bank account regardless of the currency, and your bank will handle the necessary conversion.
Tracking Payment Requests
After submitting your payment request, you can track its status in the Payment Requests section of your dashboard. You can filter your requests by :- Request ID
- Amount
- Status
- Description
- Creation Date
- Approval Date
Withdrawal Procedure
Follow these steps to withdraw your funds:Select the desired currency balance
Go to your balance in the currency corresponding to your withdrawal request (e.g., Euro or CFA Franc).
Submit a transfer request
From your dashboard, submit a transfer request to the associated bank account or Mobile Money.
Request validation
FedaPay will review the request and validate the withdrawal, provided there are no transaction disputes from the previous week.
Key Details to Remember:
- All transactions marked as Transferred are available in your merchant account balance.
- Approved transactions require 72 hours to be transferred to your balance.
- Transfers can be made to a bank account, Mobile Money.
Currently Supported Currencies
At present, FedaPay only supports CFA Franc (XOF) for transactions. Additional currencies will be added progressively. If you need a specific currency not currently available, please contact FedaPay to request it. Supported CurrenciesISO Code
XOF, GNF
Numéro ISO
952, 324
Devise
CFA Franc (UEMOA), Guinean Franc
Pays
African Financial Community BCEAO, Guinea